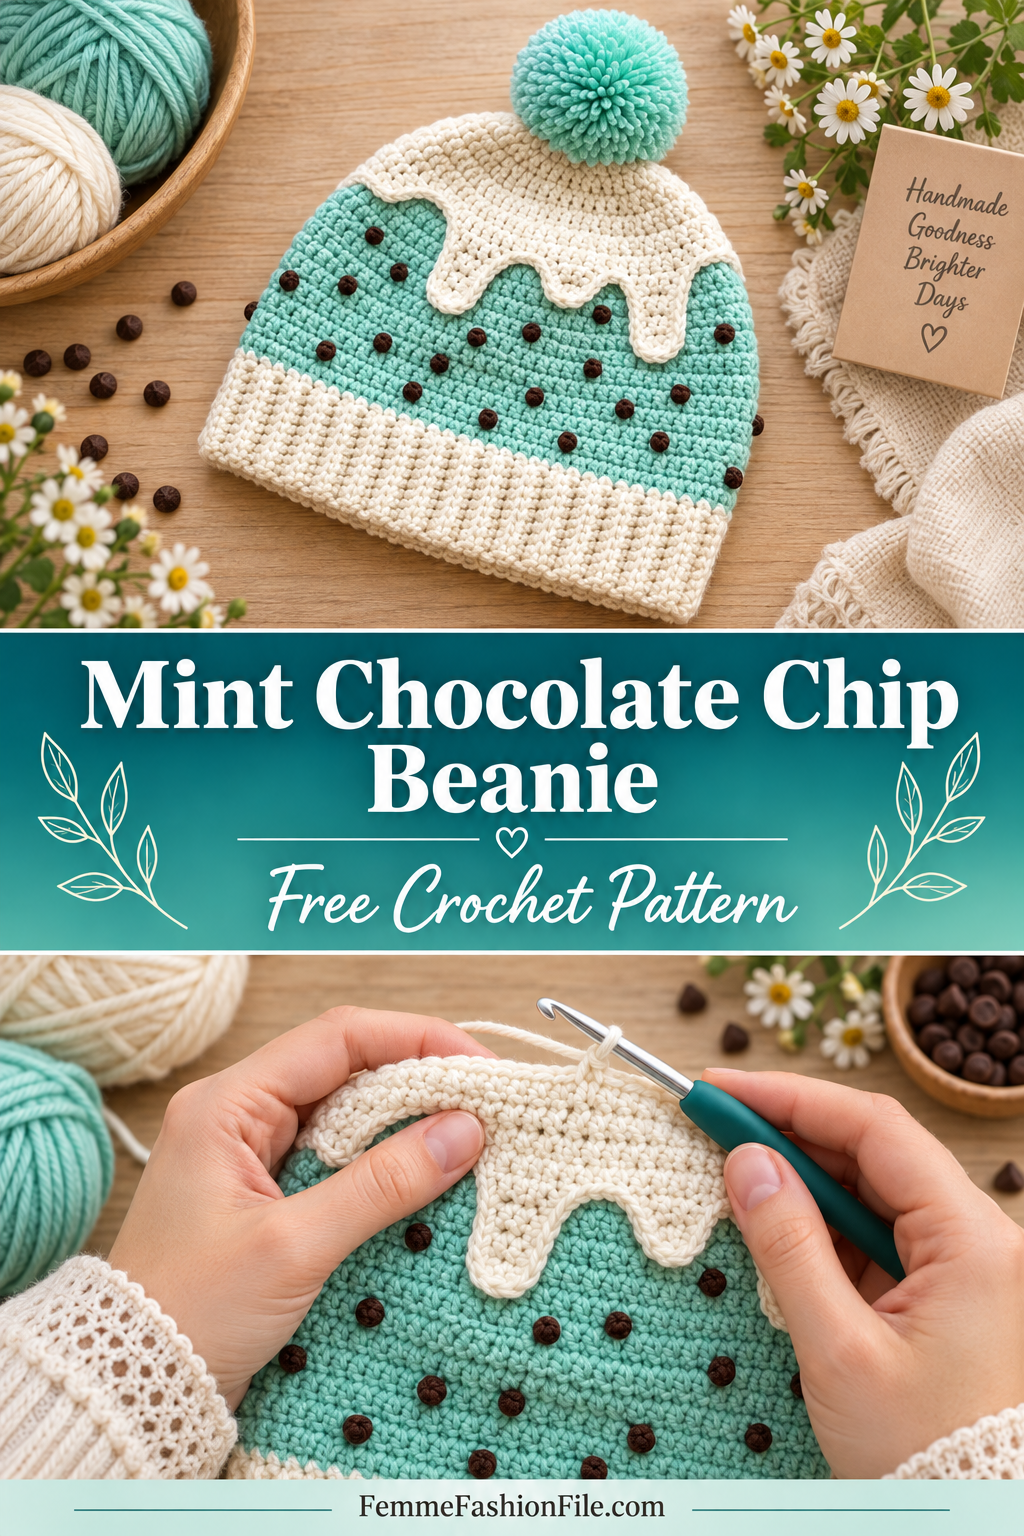
Mint Chocolate Chip Beanie Free Crochet Pattern
Some crochet projects feel cheerful before you have even made the first stitch. This mint chocolate chip beanie is one of them. The soft mint body, tiny chocolate details, creamy melted topping, and fluffy pom-pom turn a practical winter hat into something playful and sweet.
I also wanted this design to feel calm to make. The beanie is built from simple pieces, the shaping follows an easy rhythm, and the decorative details are added at the end. You do not have to manage several complicated techniques at once. Take it one section at a time, and let the hat grow in your hands.
This free crochet pattern is written for an adult medium, with simple notes for adjusting the size. I explain not only what to do, but why each part works, so you can crochet with confidence and make the beanie truly yours.
Mint Chocolate Chip Beanie at a Glance
- Skill level: Confident beginner
- Construction: Ribbed brim worked flat, body and crown worked in joined rounds
- Finished fit: Adult medium, approximately 21–23 in (53–58 cm) head circumference
- Finished height: Approximately 8.5–9 in (21.5–23 cm), excluding pom-pom
- Terminology: US crochet terms
Why This Construction Works
The brim is crocheted sideways through the back loop. This creates stretchy vertical ribs that sit comfortably around the head. Once the short ends are joined, stitches are worked evenly around the top edge, giving us a clean foundation for the mint body.
The body uses half double crochet because it is warm without feeling too stiff. The crown decreases in eight evenly spaced sections. Keeping those decreases aligned helps the top close smoothly instead of forming a bulky point.
The chocolate chips are embroidered after the beanie is finished. That means you can spread them naturally, avoid carrying dark yarn inside the hat, and decide exactly how playful you want the final look to be.
Materials
- Worsted-weight yarn, category 4
- Approximately 120 yd (110 m) cream yarn
- Approximately 170 yd (155 m) mint yarn, plus extra for the pom-pom
- Approximately 10 yd (9 m) dark brown yarn for the chocolate chips
- 5 mm (H-8) crochet hook, or size needed to meet gauge
- Yarn needle
- Scissors
- Stitch marker
- Pom-pom maker or a piece of cardboard, optional
Gauge
14 half double crochet stitches and 10 rounds = 4 in (10 cm), worked in the round.
Gauge matters most around the body of the hat. If your stitches are too tight, the beanie may not stretch comfortably. If they are too loose, the fabric may feel floppy and the hat may finish too large. Make a small swatch, wash it as you plan to wash the finished beanie, and measure again before you begin.
Abbreviations
- ch – chain
- hdc – half double crochet
- hdc BLO – half double crochet in the back loop only
- hdc2tog – half double crochet two stitches together
- sc – single crochet
- sl st – slip stitch
- st(s) – stitch(es)
- rep – repeat
Pattern Notes
- Chain stitches at the beginning of rows and rounds do not count as stitches.
- Join each round with a slip stitch to the first stitch.
- Use a marker in the first stitch of every round to make counting easier.
- The body stitch count is a multiple of eight so the crown decreases divide evenly.
- Measure the ribbed brim gently, without stretching it.
- For a neat color change, complete the final yarn-over of the last stitch with the new color.
Free Mint Chocolate Chip Beanie Crochet Pattern
1. Cream Ribbed Brim
With cream yarn, ch 11.
Row 1: Hdc in the second ch from the hook and in each ch across. Turn. (10 hdc)
Row 2: Ch 1. Hdc BLO in each st across. Turn. (10 hdc)
Repeat Row 2 until the strip measures approximately 19.5 in (49.5 cm), or about 2–3 in (5–7.5 cm) smaller than the wearer’s actual head circumference.
Bring the short ends together without twisting the strip. Slip stitch through both layers to form a ring. Turn the seam to the inside.
Why the brim is smaller than the head: Crochet stretches. This small amount of negative ease helps the finished hat stay in place instead of slipping down.
2. Mint Body
Join mint yarn at the top edge of the brim.
Setup Round: Ch 1. Work 72 sc evenly around the top edge. Join. (72 sc)
Rounds 1–12: Ch 1. Hdc in each st around. Join. (72 hdc)
At the end of Round 12, the mint section should measure approximately 4.75–5 in (12–12.5 cm) above the brim. Add or remove a plain round here if you prefer a taller or shorter beanie.
3. Cream Crown
Change to cream yarn.
Round 13: Ch 1. *Hdc in next 7 sts, hdc2tog; rep from * around. Join. (64 sts)
Round 14: Ch 1. Hdc in each st around. Join. (64 sts)
Round 15: Ch 1. *Hdc in next 6 sts, hdc2tog; rep from * around. Join. (56 sts)
Round 16: Ch 1. *Hdc in next 5 sts, hdc2tog; rep from * around. Join. (48 sts)
Round 17: Ch 1. *Hdc in next 4 sts, hdc2tog; rep from * around. Join. (40 sts)
Round 18: Ch 1. *Hdc in next 3 sts, hdc2tog; rep from * around. Join. (32 sts)
Round 19: Ch 1. *Hdc in next 2 sts, hdc2tog; rep from * around. Join. (24 sts)
Round 20: Ch 1. *Hdc in next st, hdc2tog; rep from * around. Join. (16 sts)
Round 21: Ch 1. Hdc2tog around. Join. (8 sts)
Fasten off, leaving a 10 in (25 cm) tail. Thread the tail through the front loop of each remaining stitch, pull the opening closed, and secure firmly on the inside.
4. Chocolate Chip Details
Thread a yarn needle with dark brown yarn. Add 16–22 small French knots across the mint section, spacing them irregularly for a natural chocolate-chip look.
To make a French knot, bring the needle from the inside to the outside of the hat. Wrap the yarn around the needle two or three times. Hold the wraps gently, insert the needle very close to the exit point, and pull it through to the inside.
Keep your tension relaxed. If the yarn is pulled too tightly between knots, the fabric will pucker and lose its stretch. Secure the yarn every few knots rather than carrying it across a large area.
5. Melted Cream Drip Band
This separate band creates the soft ice-cream edge and hides the color-change line.
With cream yarn, ch 73.
Row 1: Sc in the second ch from the hook and in each ch across. Turn. (72 sc)
Row 2: Ch 1. Sc in the first 5 sts. *Sc in the next 5 sts, ch 5, sc in the second ch from the hook and in the next 3 ch, sl st in the next base st; sc in the next 6 sts, ch 7, sc in the second ch from the hook and in the next 5 ch, sl st in the next base st.* Repeat from * to * three more times. Sc in each remaining base stitch.
Fasten off with a long sewing tail. Wrap the band around the hat with the straight edge sitting just inside the cream crown and the drips pointing down over the mint body. Overlap the ends neatly, then sew the straight edge and each drip in place with small, loose stitches.
The drips do not need to be perfectly symmetrical. A slightly uneven arrangement makes the melted topping feel softer and more playful.
6. Mint Pom-Pom
Make a firm pom-pom approximately 3.5–4 in (9–10 cm) across using mint yarn. Trim it into a round shape. Thread the tying tails through opposite sides of the closed crown and knot securely inside the hat.
If the beanie is for a small child, sew the pom-pom especially firmly and check it regularly. You may also leave it off for a simpler, washable finish.
Finishing
- Weave in all ends on the inside without pulling the fabric tight.
- Gently steam or wet block the beanie, keeping the ribbed brim stretchy.
- Shape the cream drips with your fingers while damp.
- Allow the hat to dry completely before attaching or trimming the pom-pom.
How to Adjust the Size
The crown shaping works with any stitch count that is a multiple of eight.
- Child: Make the brim approximately 17–18 in (43–46 cm), pick up 64 stitches, and work a shorter mint section before beginning the crown.
- Adult medium: Follow the written pattern with 72 stitches.
- Adult large: Make the brim approximately 21–22 in (53–56 cm), pick up 80 stitches, and begin the crown with *hdc in next 8 sts, hdc2tog* around.
Whenever you change the stitch count, place eight markers evenly around the hat. Work one decrease before each marker on every decrease round. This keeps the shaping balanced even when your size is different from the written pattern.
Color Ideas
Mint and chocolate give this beanie its classic ice-cream look, but the same pattern can become almost any sweet treat you love:
- Pink, cream, and red for strawberry sundae
- Pale yellow, cream, and brown for banana cream
- Lavender, white, and deep purple for blueberry frosting
- Warm tan, caramel, and dark brown for cookie dough
Changing color is one of the easiest ways to make a handmade project feel personal. Use yarn already in your basket, choose the wearer’s favorite flavor, or turn the beanie into a thoughtful gift.
Troubleshooting
My brim flares away from the body
You may have worked too many stitches around the brim. Remove the setup round and try again, spacing 72 stitches as evenly as possible.
My crown looks pointed
Check that you have eight decreases in every shaping round and that the final opening is pulled closed firmly. A little blocking and the pom-pom will also soften the shape.
My chocolate chips make the hat pucker
Leave a small amount of slack behind each knot. The mint fabric still needs room to stretch around the head.
My drip band does not meet perfectly
That is easy to fix. Overlap the ends by one or two stitches and hide the join beneath one of the longer drips.
Care Instructions
Always follow the care label on your yarn. For the best shape, hand wash the beanie in cool water, press out excess moisture in a towel, and lay it flat to dry. Avoid hanging it while wet, as the weight of the water can stretch the crown and brim.
Frequently Asked Questions
Can I work the body in continuous rounds?
Yes. The body can be worked in a spiral if you prefer, but joined rounds make the color change into the cream crown easier to control. If you use a spiral, mark the first stitch carefully.
Can I replace the embroidered chips with beads?
For an adult hat, securely sewn beads are possible. For babies and young children, embroidered yarn details are the safer choice because beads can become a choking hazard.
Can I sell finished beanies made from this pattern?
Yes, you may sell finished items in small quantities. Please use your own photos of the hats you make and credit Femme Fashion File for the pattern.
A Calm, Happy Finish
This mint chocolate chip beanie is playful, but the making of it can still be quiet and steady: one rib at a time, one round at a time, one little chocolate chip at a time. If something does not look right, pause, count, and begin that small part again. Crochet is patient with us.
Make this hat for gifting, donating, selling, or keeping for yourself. However it leaves your hook, I hope it gives you that lovely feeling of turning simple yarn into something warm, useful, and full of personality.
Have fun, and always remember: stay calm and crochet.