Crochet Gingerbread House Keychain – Free Christmas Pattern
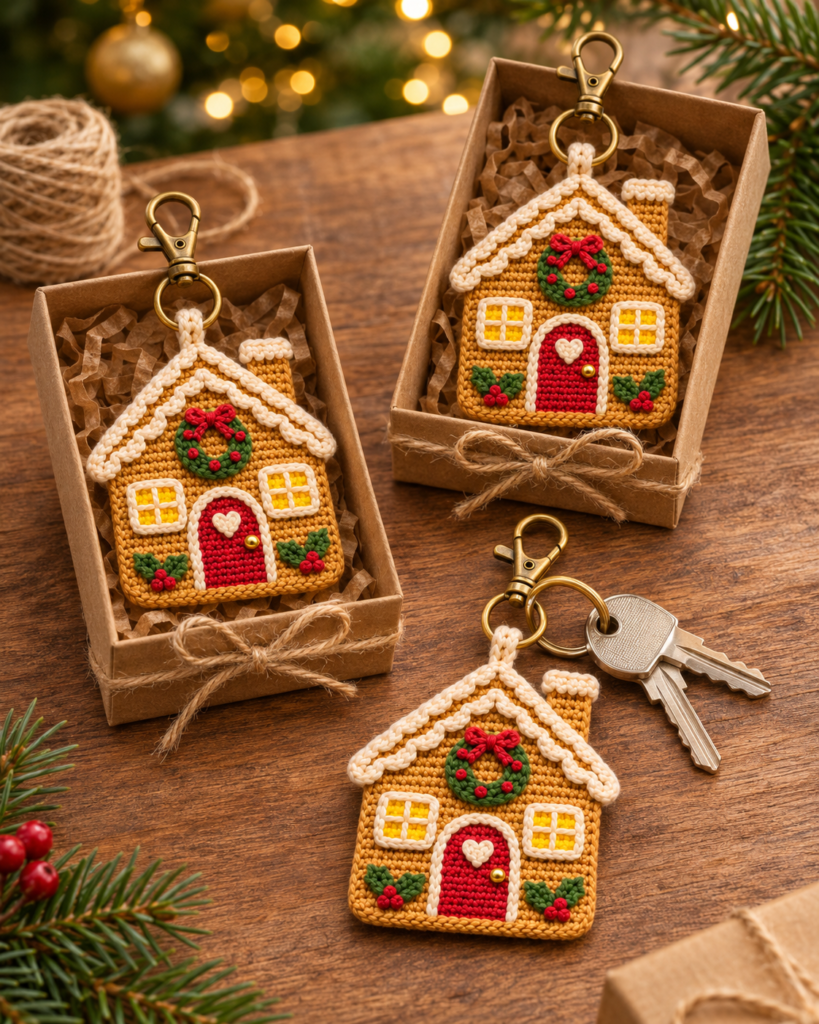
This little crochet gingerbread house keychain is one of the sweetest stocking fillers you can make. A golden-brown house with a snowy scalloped roof, a red arched door with a tiny heart, two glowing windows, a wreath with a red bow and holly at the door – all clipped to a brass lobster clasp.
It is made from two flat pieces worked in rows, joined around the edges and decorated with small appliqués and simple embroidery. Clip it to a bag, a backpack or a set of keys, or hang it on the tree.
The finished house is about 7 cm wide and 9 cm tall (2.75 × 3.5 in) without the clasp. Skill level: advanced beginner.
Why you will love this gingerbread house
- Small but full of detail. Door, windows, wreath, holly and a snowy roof – it looks like a tiny shop-bought charm.
- Simple rows. The house is only single crochet in rows, with decreases for the roof.
- Scrap-friendly. A few metres of each colour is enough.
- Perfect gift. Teachers, friends and Secret Santa swaps – it takes about two hours.
- Sturdy. Two layers and a sewn hanging loop make it strong enough for daily use on keys.
Materials you will need
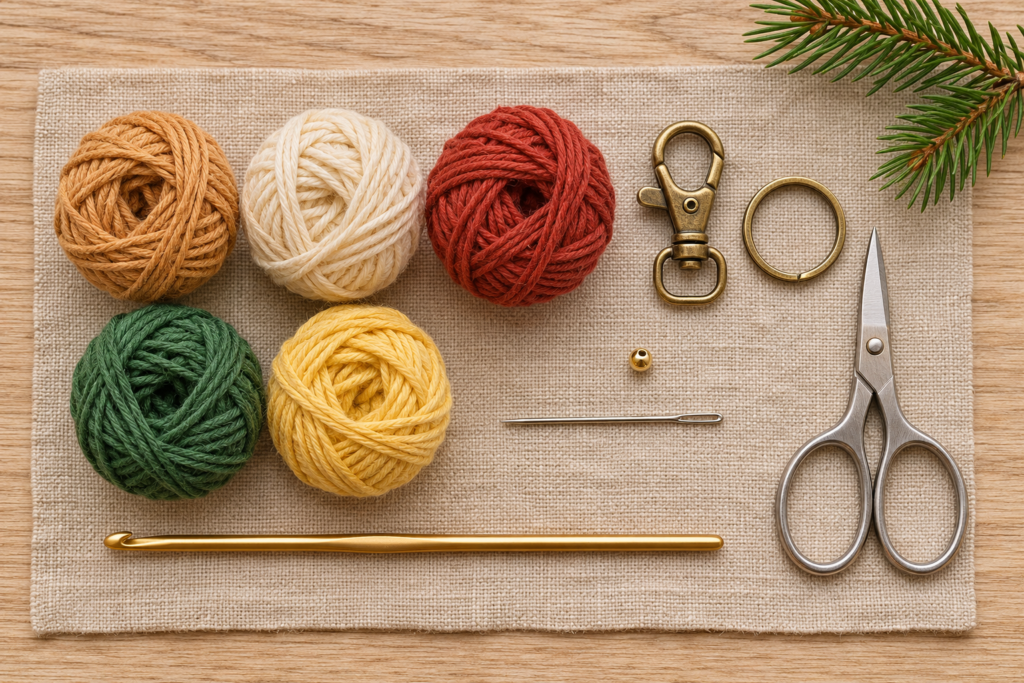
- Yarn: sport / 4-ply or light DK 100% cotton (weight 2) in golden tan (house), cream (roof, window frames, trim), red (door, bow, berries), green (wreath, holly) and a little yellow (window glow).
- Hook: 2.5 mm (C-2)
- Hardware: 1 brass swivel lobster clasp and 1 brass split key ring (about 25 mm).
- Also: 1 small gold bead or button (3–4 mm) for the door knob, a little fibre stuffing (optional), tapestry needle, embroidery needle, scissors, stitch marker.
Finished size and skill level
About 7 × 9 cm (2.75 × 3.5 in), 11 cm (4.3 in) with the hanging loop, plus the clasp. Skill level: advanced beginner – rows, decreases and a few basic embroidery stitches.
Abbreviations (US terms)
- ch – chain
- sl st – slip stitch
- sc – single crochet
- dc – double crochet
- dec – single crochet 2 together (invisible decrease works best)
- sk – skip
- (…) x 6 – repeat what is in brackets 6 times
- [24] – total stitches at the end of the round or row
Pattern notes
- The house front and back are worked in rows. Ch 1 at the start of each row does not count as a stitch.
- Work tightly: the fabric should be firm, with no gaps.
- The roof is shaped by decreasing one stitch at each end of every row.
- Embroidery stitches used: backstitch, satin stitch, lazy daisy and French knots.
Step by step
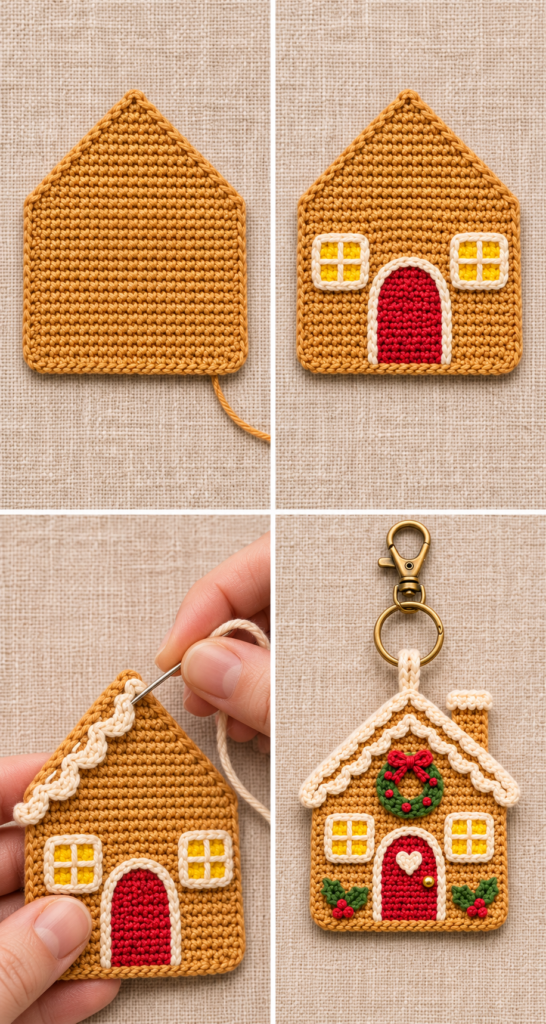
Step 1: House front and back (make 2 in tan)
- Foundation: ch 15.
- Row 1: sc in the 2nd ch from the hook and in each ch across. Turn. [14]
- Rows 2–14: ch 1, sc in each st across. Turn. [14]
- Row 15: ch 1, dec, sc in each of the next 10 sts, dec. Turn. [12]
- Row 16: ch 1, dec, sc in each of the next 8 sts, dec. Turn. [10]
- Row 17: ch 1, dec, sc in each of the next 6 sts, dec. Turn. [8]
- Row 18: ch 1, dec, sc in each of the next 4 sts, dec. Turn. [6]
- Row 19: ch 1, dec, sc in each of the next 2 sts, dec. Turn. [4]
- Row 20: ch 1, dec twice. Turn. [2]
- Row 21: ch 1, dec. [1] Fasten off.
The walls are rows 1–14 and the roof is rows 15–21. Leave a long tail on the back piece; you will use it to join.
Step 2: Chimney (tan, then cream)
- Ch 5. Row 1: sc in the 2nd ch from the hook and across. Turn. [4]
- Rows 2–5: ch 1, 4 sc. Turn. [4]
- Change to cream. Row 6: ch 1, 4 sc in the back loops. [4] Fasten off.
The cream row is the snow on top of the chimney.
Step 3: Door (red)
- Ch 6. Row 1: sc in the 2nd ch from the hook and across. Turn. [5]
- Rows 2–5: ch 1, 5 sc. Turn. [5]
- Row 6: ch 1, dec, sc, dec. [3] Fasten off, leaving a tail for sewing.
Row 6 rounds off the top of the door into a little arch.
Step 4: Wreath (green)
- Ch 10 and join with a sl st to make a ring.
- Ch 1, work 18 sc into the ring (over the chain), sl st to the first sc. [18] Fasten off, leaving a tail.
Step 5: Roof snow (cream, make 2)
- Ch 14.
- Row 1: sc in the 2nd ch from the hook and in each ch across. Turn. [13]
- Row 2: ch 1, sc in the first st, *sk 1, 5 dc in the next st, sk 1, sc in the next st* x 3. [3 scallops] Fasten off, leaving a long tail.
Each strip covers one side of the roof and is a little longer than it, so the last scallop overhangs the wall like the eaves of a real gingerbread house.
Decorating the front
- Door: sew the red door to the centre of the front piece, with its bottom edge on row 1. Backstitch a cream outline all around the arch. Sew the gold bead on the right as a door knob and embroider a small cream heart (two lazy daisy stitches) near the top.
- Windows: on each side of the door, between rows 5 and 10, fill a square of 3 stitches by 4 rows with yellow satin stitch. Outline it in cream backstitch and add a cream cross in the middle for the window panes.
- Wreath: sew the wreath above the door on rows 12–15. Add four red French knots for berries and embroider a small red bow at the top with two lazy daisy loops and two short tails.
- Holly: at each bottom corner, make two green lazy daisy leaves and three red French knot berries.
Putting the house together
- Place the front and back with wrong sides together. With tan, sc through both layers all around the walls and roof, working 3 sc in each bottom corner. Add a little stuffing before you close the roof if you like a puffy house.
- Sew the chimney to the right side of the roof so that its cream top sits just above the roof line.
- Pin a roof snow strip along each side of the roof, flat edge along the top and scallops hanging down over the walls. Sew them on, meeting at the peak.
- Hanging loop: join cream at the roof peak, ch 12, sl st back into the peak. Work 14 sc over the chain loop and sl st to close. Slip the split ring through the loop and add the lobster clasp.
Finishing checklist
- Door centred and straight, with the knob firmly sewn.
- Windows level with each other.
- Roof snow meeting neatly at the peak with no gap.
- Hanging loop sewn through both layers so it cannot pull out.
Common mistakes and how to fix them
- The roof leans to one side. Make sure both decreases are worked in every roof row – one at the start and one at the end.
- The edges are wavy. Work the first and last stitch of every row into the very edge stitches; count 14 on every wall row.
- Embroidery puckers. Do not pull the thread tight, and stitch through the front layer only before joining.
- The loop stretches. The single crochet worked over the chain loop makes it strong; do not skip it.
Ways to make it your own
- Leave off the clasp and add a ribbon loop to make a tree ornament.
- Make a pink house with white roof icing for a candy look.
- Add the recipient’s initial in cream backstitch on the door.
- Make three in different sizes (try DK and a 3.5 mm hook) for a gingerbread village garland.
Safety and care
The bead door knob and the clasp are small parts, so for babies and small children embroider the knob instead and use the house as a decoration only. Spot clean with a damp cloth; if needed, hand wash in cool water and dry flat.
More Christmas patterns you will love
Make a few crochet pearl bell ornaments to go with it, crochet the cosy Sleepy Santa, or set your table with crochet snowflake coasters.
Frequently asked questions
How long does it take?
About two hours: an hour for the pieces and an hour for the decoration and joining.
Can I use thicker yarn?
Yes. DK cotton with a 3.5 mm hook makes a house about 9 × 12 cm – better as a tree ornament than a keychain.
Can I skip the embroidery?
You can, but the windows and wreath give the house its charm. Even just the door and windows look lovely.
Where do I buy the clasp?
Look for “swivel lobster clasp with key ring” in craft shops or the jewellery section; brass or antique gold matches best.
Save this gingerbread house keychain to your Christmas crochet board on Pinterest, and happy crocheting!