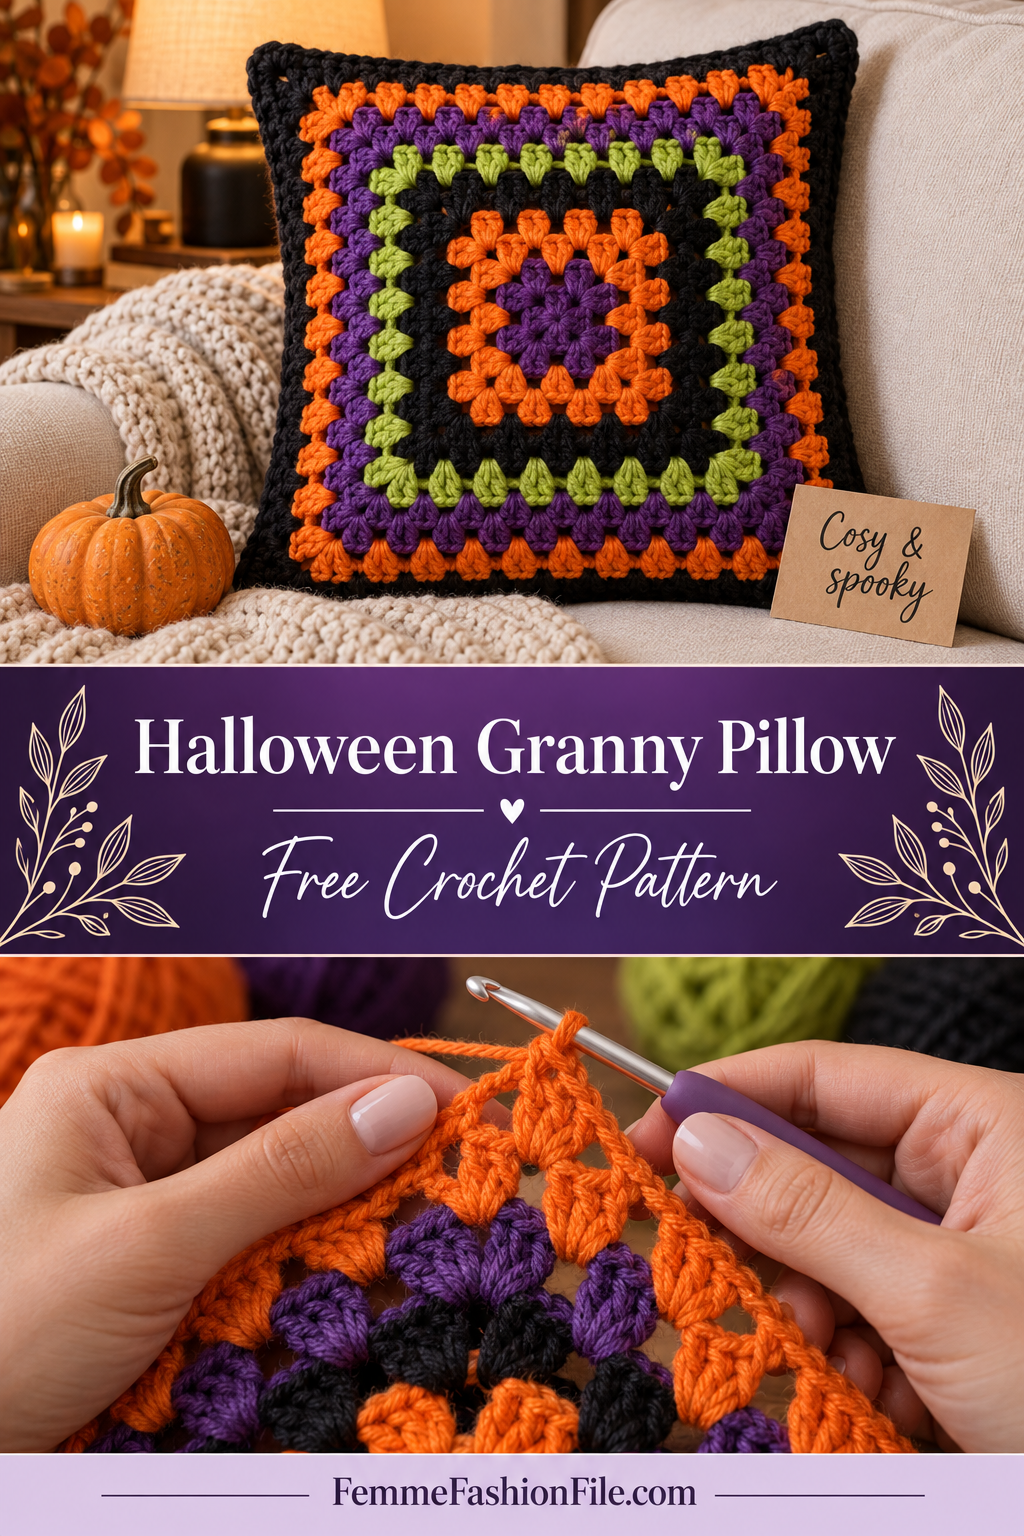
Halloween Granny Square Pillow – Free Crochet Pattern
A Halloween granny square pillow is the easiest way to change the feeling of a whole room for October. Drop it into the corner of a sofa or onto a reading chair, and the space instantly feels cosy and seasonal without a single cobweb or plastic skeleton in sight.
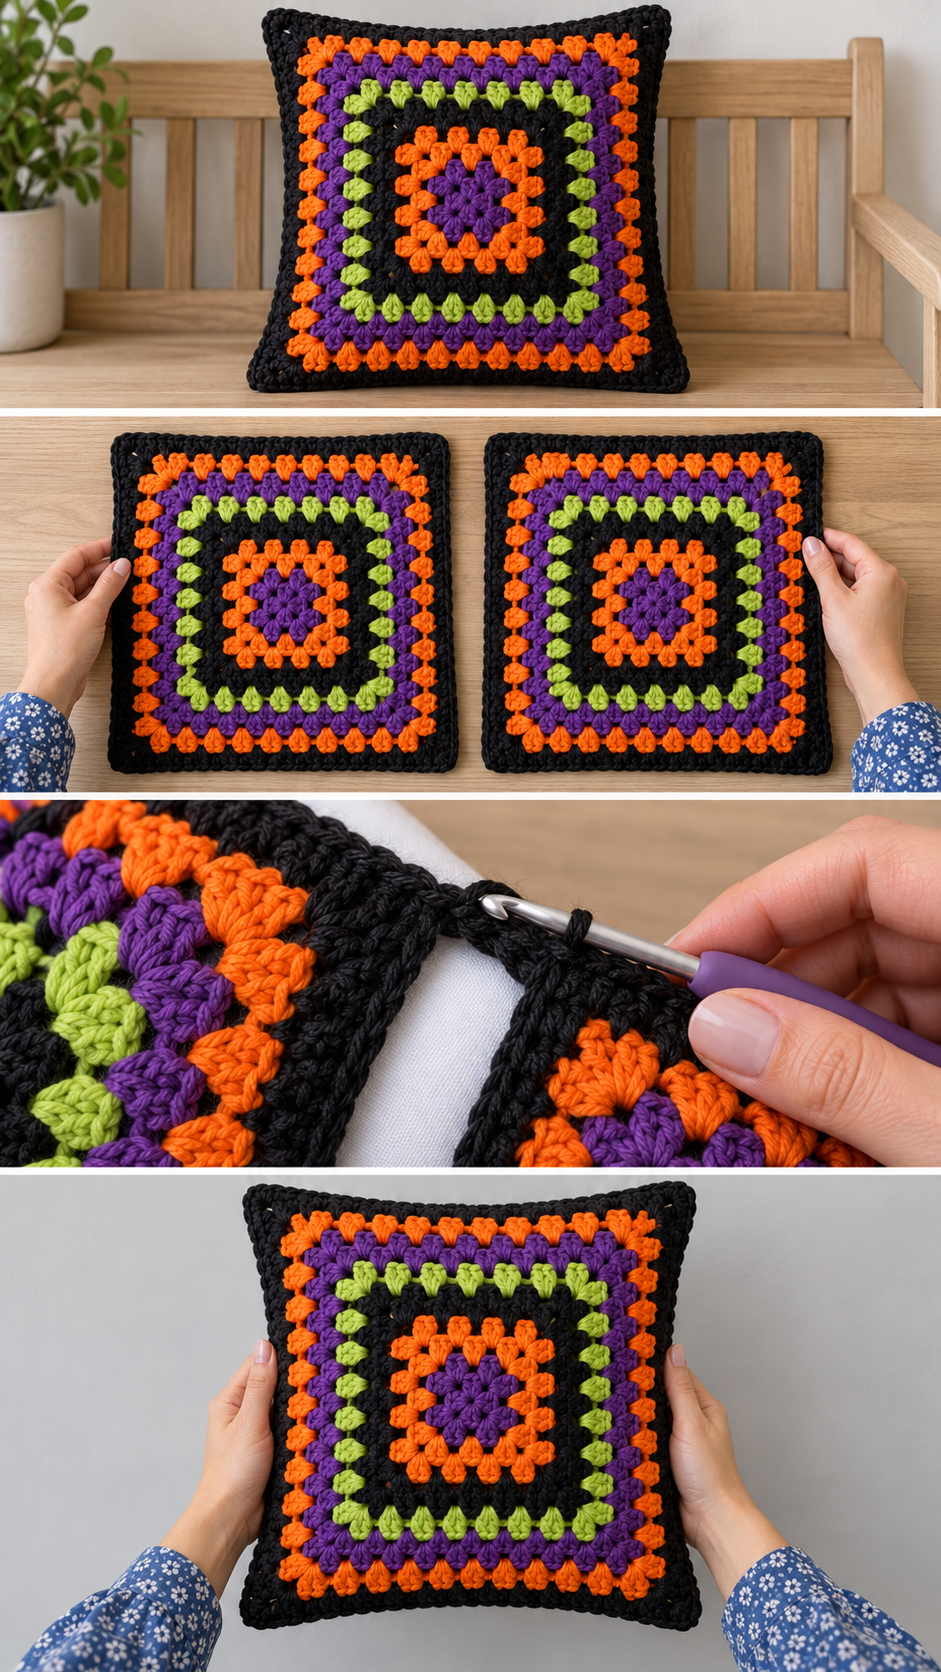
It is made from two large granny squares striped in orange, purple, black and lime green, joined together around a cushion pad with a black single crochet border. When Halloween is over, it still works as a bold, cheerful cushion for the rest of autumn.
You need a chain and double crochet, plus single crochet for the join. If you have made the snowflake tote or the giant granny blanket on this site, you already know every stitch.
Why this Halloween granny square works
A granny square grows by exactly twelve double crochet every round: two groups of three at each of the four corners, plus one more group along every side. The corners do all the shaping, so the square stays flat and true no matter how big it gets.
That makes it very easy to size. Round one has 12 stitches, round two 24, round seven 84. Count any round and divide by twelve, and you know exactly where you are.
The honest trade-off: granny squares have small holes between the groups. On a pillow the cushion pad shows through slightly, so choose a pad in a dark colour, or cover a white pad in black fabric first.
Materials you will need
- Yarn: worsted weight in four colours — about 70 yards each of orange, purple and lime green, and about 120 yards of black for rounds, joining and border
- Hook: 5.0 mm (H-8)
- Cushion pad: sized to your finished square — see below
- Notions: tapestry needle, scissors
An acrylic or acrylic-wool blend is ideal for a cushion: soft, durable and easy to wash. Pure cotton works too, but it is heavier and less springy.
Sizing and cushion pad
Seven rounds in worsted weight on a 5.0 mm hook make a square about 10″ across. Nine rounds make about 13″. Measure your finished square before buying a pad, then choose a pad about an inch larger than the square. A slightly overstuffed pillow looks plump and full; a loose one looks sad.
Abbreviations
- ch = chain.
- dc = double crochet: yarn over, insert hook, yarn over and pull up a loop (3 loops), yarn over and pull through 2, yarn over and pull through the last 2.
- sc = single crochet.
- sl st = slip stitch.
- sp = the space between groups or under a chain.
- corner = 3 dc, ch 2, 3 dc worked into a ch-2 corner space.
Pattern notes
- Worked in joined rounds with the right side facing.
- The ch 3 at the start of a round counts as the first dc.
- All groups go into spaces, never into stitches.
- Change colour at the end of a round by fastening off and joining the new colour in a corner.
- Make two identical squares.
Colour order
A reliable order for seven rounds is: black, orange, purple, lime, orange, purple, black. The black centre and black final round frame the brighter colours, and the repeat of orange and purple ties the square together.
Step by step
Part 1: The granny square (make 2)
Round 1: Make a magic ring. Ch 3, 2 dc into the ring, ch 2, *3 dc into the ring, ch 2*; repeat twice more. Join to the top of the ch 3. (12 dc)
Round 2: Join the new colour in any corner. Ch 3, 2 dc, ch 2, 3 dc in the same corner. *Work a corner in the next corner space*; repeat twice. Join. (24 dc)
Round 3: Join the next colour in a corner. Work a corner. *3 dc in the gap between groups, corner in the next corner space*; repeat around, ending with 3 dc in the last gap. Join. (36 dc)
Rounds 4 to 7: Work a corner in each corner space and 3 dc in every gap along each side. Each side gains one group per round. (48, 60, 72, 84 dc)
Check: on Round 7, each side has six groups between the corners. If one side has five or seven, a gap was missed or doubled.
Part 2: Joining around the pad
Place the two squares wrong sides together, lining up the corners and the stitches.
Join black through both squares at one corner. Ch 1 and work sc through both layers together, one sc in every stitch and every space, with 3 sc at each corner. Work three sides this way.
Slide the cushion pad inside, pushing it into the corners. Then close the fourth side the same way. Join to the first sc.
Part 3: The border
Border round: Ch 1, sc in each st around, 3 sc into the centre stitch of each corner. Join and fasten off.
For a scalloped edge, work *sc in next st, sk 1, 5 dc in next st, sk 1*; repeat around instead, adjusting at the corners.
A reversible pillow
Make the second square in a different colour order — for example orange, black, orange, black — and the pillow has two faces. Flip it to the calmer side after Halloween and it carries straight on into November.
Choosing colours
Four colours sounds a lot, but Halloween palettes work because they are strong. If lime feels too bright, swap it for a moss green. For a softer, more grown-up version, use rust, plum, charcoal and mustard. Lay the balls side by side before starting; if two look too similar, the stripes will blur.
Common mistakes and how to fix them
The square is twisting
Every round starts in the same corner. Start each new colour in the next corner along.
The corners are rounded
The ch 2 in each corner is missing. The corner needs that gap to turn sharply.
The two squares are different sizes
Tension changed between them. Block both squares to the same size before joining.
Finishing and care
Remove the pad and hand wash or machine wash on a gentle cycle according to your yarn. Dry flat and reshape.
Frequently asked
Can I make a bigger pillow?
Yes. Keep adding rounds until the square is the size you want, and buy a pad an inch bigger.
Can I make a blanket instead?
Make many small squares in the same colours and join them, or keep one square growing into a throw.
Choosing a Halloween palette
Classic Halloween colours — orange, black, purple and lime — are bright and fun, but there are other palettes worth trying. A moody, grown-up version in rust, plum, charcoal and mustard suits a living room that is decorated all autumn. A soft, pastel version in peach, lilac, grey and mint is lovely for a child’s bedroom and not at all frightening. A black-and-white version, with only one round of orange, is striking and very modern.
Whatever you pick, use the darkest colour in the centre and the outer round. The darker frame pulls the square together and makes the brighter middle colours glow.
Making a matching set
A single pillow is lovely; two pillows with the colour orders reversed look designed. Make one with a black centre and one with an orange centre. Add a small granny square blanket in the same colours thrown over the arm of the sofa, and you have a complete Halloween corner. Because every piece uses the same granny square maths, they all match perfectly in scale.
Weaving in the ends
Seven colour changes mean fourteen ends per square. Weave each one into the back of its own colour as you go, working in at least two directions. Ends that are woven into a different colour can show through as a shadow on the front, particularly with black next to orange.
How long it takes
Each seven-round square takes about two or three hours, depending on how quickly you work double crochet. With both squares, the join and the border, the whole pillow is a weekend project. The final colour-change ends take a while, so weave them in as you finish each round rather than saving them all for the end.
If you want a faster version, make one large square for the front and back the pillow with a piece of plain black fabric. It halves the crochet and still looks striking on a sofa.
Choosing a cushion pad
A feather pad gives the softest, most sinkable pillow and holds a plump shape well. A polyester pad is lighter, cheaper and easier to wash. Whichever you choose, go one size up from your square: a snug fit fills out the granny stitches and makes the colours look bold. A dark pad or a black fabric cover stops any pale filling showing through the gaps.
Before you start
Decide your colour order and write it down. The squares come out best when both follow the same plan. More spooky makes are in Halloween.