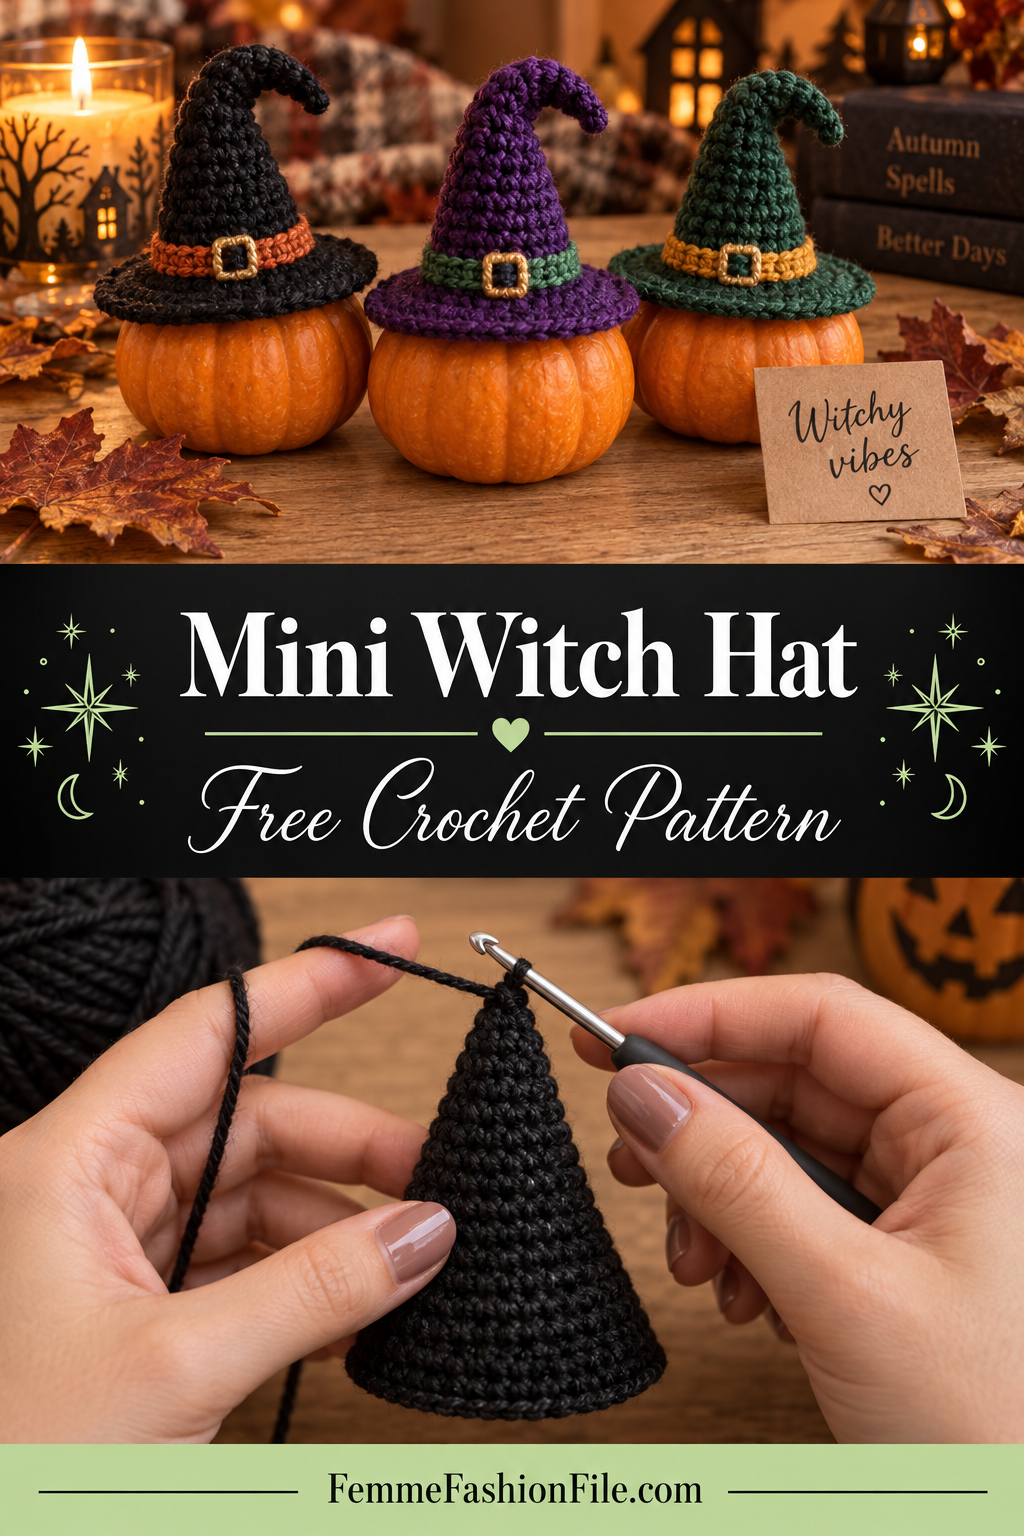
Mini Crochet Witch Hat – Free Halloween Pattern
A mini crochet witch hat is the small detail that makes a Halloween display look finished. Perch one on top of a pumpkin, a jar or a stack of books and everything around it suddenly has a character. Make three in black, purple and green and they look like a little coven gathered on the mantelpiece.
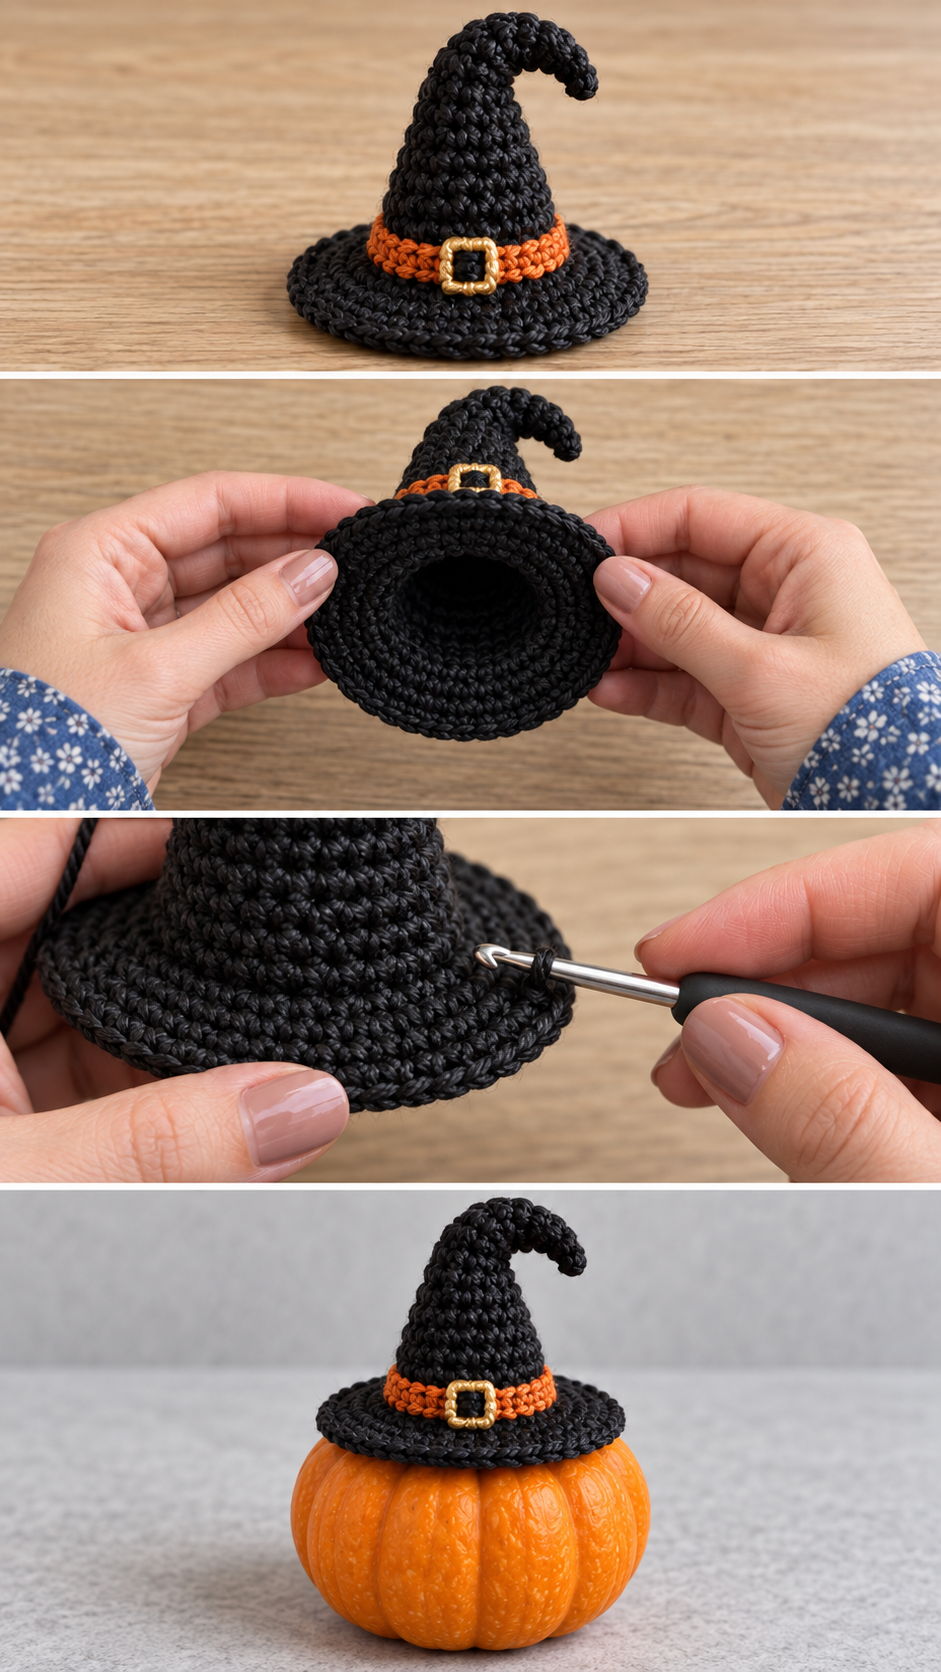
This hat has a tall, narrow crown with a bend at the tip, a wide flat brim and a contrasting band with a tiny buckle. It is roughly 4″ tall, and it takes about an hour.
You need to work in the round and increase. The only technique that might be new is working into the front loops to start the brim, and it is explained step by step.
Why this crochet witch hat works
A witch hat crown is a tall, slim cone. Increasing by six stitches a round makes a flat circle, and by three makes a cone like a strawberry. For something much taller and narrower, this pattern increases by only two stitches, and only every other round. The fabric has almost nowhere to spread, so it climbs.
The brim is the opposite. Working the first brim round into the front loops only folds the fabric sharply outward, and from there the brim grows by six stitches a round, exactly like a flat circle. That keeps it perfectly flat rather than wavy.
The honest trade-off: a crochet brim is soft. On a small hat it holds its shape well, but if you want a brim that stays dead flat in every weather, a light spray of fabric stiffener or a thin ring of card slipped under the brim helps.
Materials you will need
- Main yarn: about 30 yards of worsted weight in black, deep purple or forest green
- Band yarn: a few yards of a contrasting colour — orange, lime or purple
- Hook: 3.5 mm (E-4)
- Notions: stitch marker, tapestry needle, scissors
- Optional: a small buckle charm or a tiny square of gold felt, fabric stiffener
Finished size
About 4″ tall and 3″ across the brim, in worsted yarn on a 3.5 mm hook. The crown opening fits over a small pumpkin, a jam jar lid or a bottle neck.
Abbreviations
- MR = magic ring: a loop you work into, then pull closed.
- sc = single crochet: insert hook, yarn over and pull up a loop (2 loops on hook), yarn over and pull through both.
- inc = 2 sc in the same stitch. Adds one stitch.
- dec = invisible decrease: insert hook into the front loop only of the next two stitches, yarn over and pull through 2 loops, yarn over and pull through the last 2.
- FLO / BLO = front loop only / back loop only.
- ch = chain.
- sl st = slip stitch.
Pattern notes
- Worked in continuous spiral rounds from the tip down.
- Mark the first stitch of each round.
- Counts are in brackets. The crown gains two stitches every other round.
- The crown is left hollow so the hat can sit over something.
Step by step
Part 1: The crown
Round 1: 4 sc into a MR. Pull tight. (4)
Round 2: Sc in each st around. (4)
Round 3: *Sc in next st, inc*; repeat twice. (6)
Round 4: Sc in each st around. (6)
Round 5: *Sc in next 2 sts, inc*; repeat twice. (8)
Round 6: Sc in each st around. (8)
Continue in this rhythm. On every odd round, work one more sc between the two increases than before; on every even round, work plain sc around.
Rounds 7 to 21: The counts on the increase rounds go 10, 12, 14, 16, 18, 20, 22, 24, and on Round 21 you reach (24).
Check: the crown should be a tall, narrow cone about 3½″ tall. If it is short and wide, you are increasing on every round instead of every other round.
Part 2: The brim
Round 22: Working in the FLO only, *sc in next 3 sts, inc*; repeat 6 times. (30) The crown now turns sharply outward.
Round 23: *Sc in next 4 sts, inc*; repeat 6 times. (30 → 36)
Round 24: *Sc in next 5 sts, inc*; repeat 6 times. (42)
Round 25: *Sc in next 6 sts, inc*; repeat 6 times. (48)
Round 26: Sl st in each st around for a firm, neat edge. Fasten off.
Check: lay the hat on a table. The brim should lie flat. If it waves, your tension has loosened — press it flat with steam.
Part 3: The band
Find the ring of back loops left unworked at Round 21, where the crown meets the brim. Join the contrast colour there and work one round of sc into those back loops, then one more round of sc on top. Fasten off. The band sits upright around the base of the crown.
Sew a tiny buckle charm or a small square of gold felt to the front of the band.
Part 4: The bend
Bend the top third of the crown to one side. To hold it, take a single stitch with matching yarn from the tip down to the side of the crown and pull gently until the tip droops at the angle you like. Knot inside.
Ways to use your witch hats
Pumpkin toppers: the open crown fits over the stem of a small real or crochet pumpkin. It is the easiest way to give a pumpkin a personality.
A garland: make five hats and thread a length of yarn through the tip of each, spacing them out, for a mantelpiece or a window.
Ornaments: add a loop at the tip and hang them from a branch.
Toppers for bottles and jars: perfect for a potion-bottle display or a party table.
Choosing colours
Black is traditional, but deep purple, bottle green and midnight blue look richer under candlelight. A contrasting band is what lifts the hat — orange on black, lime on purple, or a thin gold thread held with the yarn. A glittery or metallic yarn for the band looks especially magical.
Common mistakes and how to fix them
The brim is wavy
Too many stitches. Count the brim rounds: 30, 36, 42, 48. If they are right, block the brim flat with steam.
The crown collapses
The yarn is too soft for a cone this tall. Use a firmer cotton, or lightly stuff the crown for display.
The band will not stand up
It went into both loops. Find the unworked back loops at the crown’s base.
Finishing and care
Store flat in a box so the crowns are not crushed. A quick steam brings a squashed hat back to shape.
Frequently asked
Can I make a wearable witch hat?
Yes, with the same method in chunky yarn and a larger hook. Keep increasing the crown until the opening fits the head, then add a wider brim. It is a longer project but the principle is identical.
Can a cat wear it?
Only for a photo, and only if your cat agrees. Never leave any hat or elastic on a pet unsupervised.
Making the brim stiffer
For a hat that keeps a crisp, flat brim through the whole season, three simple options work. A light spray of fabric stiffener, brushed on and left to dry with the brim pinned flat, gives a firm finish. A ring of thin card cut to the size of the brim and slipped underneath before the last round is invisible and very effective. Or, for a natural finish, work the whole brim in cotton rather than acrylic and block it with steam.
Witch hats for a party
Mini witch hats make great party decorations. Hang them upside down from the ceiling on fine thread at different heights for a floating hat display. Put one on top of each place card on a table. Stick a small hat on top of a cupcake tower, or tie one to the lid of a jar of sweets. They are also a lovely take-home favour for guests.
Choosing yarn
A firm cotton makes the tallest, crispest crown. Acrylic works but can droop a little at the tip, which honestly suits a witch. A glittery black or a yarn with a metallic thread running through it catches candlelight beautifully and makes the hats feel magical rather than spooky.
How long it takes
One mini witch hat takes about an hour: forty minutes for the crown, ten for the brim and ten for the band and bend. Once you know the rhythm of the crown rounds, a small coven of five can be made over a couple of evenings. They are small enough to carry around and work on anywhere.
Before you start
Keep a pencil tally of the crown rounds — odd rounds increase, even rounds do not. More spooky makes are in Halloween.