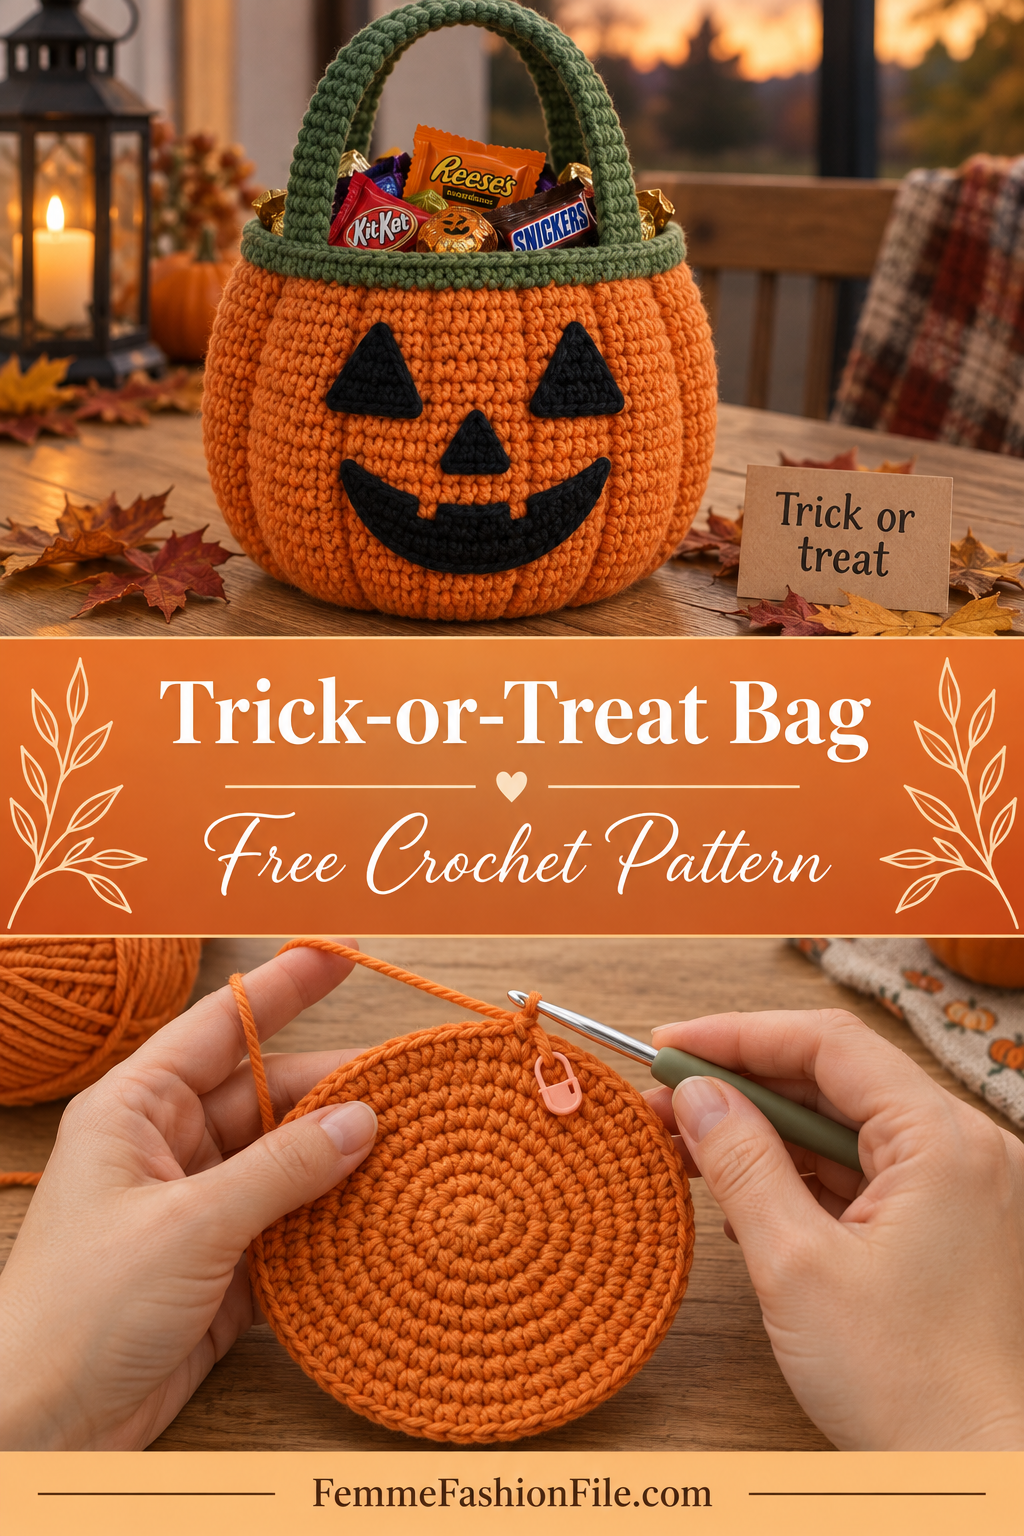
Jack-o’-Lantern Crochet Trick-or-Treat Bag – Free Pattern
A crochet trick-or-treat bag is a gift a child will remember for years. Instead of a plastic bucket that cracks by November, this one is soft, strong and machine washable, and it comes out again every October. It is shaped like a round pumpkin bucket, with a flat base so it stands up, a green rim like a stem, two built-in handles and a friendly jack-o’-lantern face.
The construction is the same as the round crochet basket on this site: a flat circle base, a sharp corner round, and straight walls. The face is made from small crochet triangles sewn on at the end, which means you can design any expression you like.
You need single crochet, working in the round, and a little sewing. It is an ideal project if you have already made a basket or a pair of coasters.
Why this trick-or-treat bag works
The base grows by exactly six stitches a round until it is ten rounds across. That keeps it perfectly flat and round, so the bag stands on its own while a child is picking sweets. One round worked in the back loop only turns the corner crisply, and the walls rise straight from there.
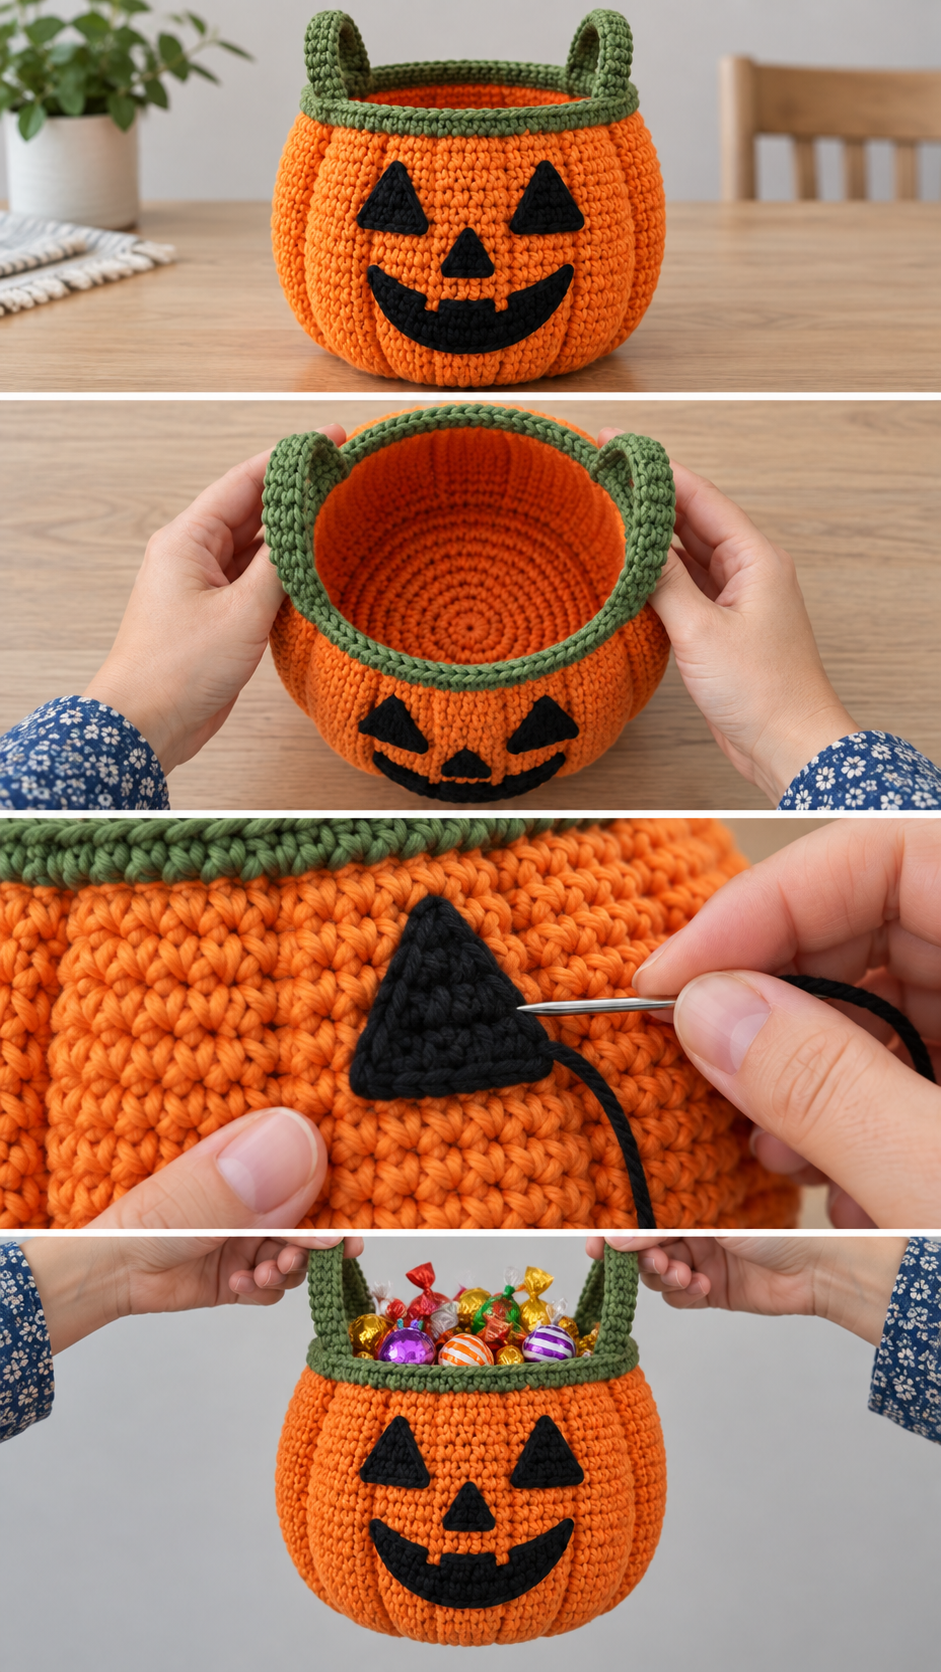
The handles are not sewn on. They are made by skipping stitches on one round and chaining across the gap, then working stitches into those chains on the next round. Because they are part of the fabric, they cannot pull off — which matters a great deal when a small child swings the bag around.
The honest trade-off: a bag in solid single crochet uses a fair amount of cotton and takes a few evenings. It is a keepsake rather than a quick make. If you are short of time, the smaller size below halves the work.
Materials you will need
- Orange yarn: about 250–300 yards of worsted weight cotton
- Green yarn: about 30 yards for the rim
- Black yarn: about 15 yards for the face
- Hook: 5.0 mm (H-8)
- Notions: stitch marker, tapestry needle, scissors, pins
Cotton is the right choice here. It is strong, it holds its shape, and it goes through the washing machine after a rainy Halloween night. Acrylic stretches and the bag slowly sags under the weight of sweets.
Finished size
About 8″ across the base and 7″ tall, not counting the handles. For a toddler, stop the base at Round 8 (48 stitches) and work fewer wall rounds for a bag about 6″ across.
Abbreviations
- MR = magic ring: a loop you work the first round into, then pull tight to close.
- sc = single crochet: insert hook, yarn over and pull up a loop (2 loops on hook), yarn over and pull through both.
- inc = 2 sc in the same stitch. Adds one stitch.
- dec = invisible decrease: insert hook into the front loop only of the next two stitches, yarn over and pull through 2 loops, yarn over and pull through the last 2.
- BLO = back loop only: work into the loop furthest from you.
- ch = chain.
- sk = skip.
- sl st = slip stitch.
Pattern notes
- The base and walls are worked in continuous spiral rounds. Mark the first stitch of each round.
- Counts are in brackets. The base is always a multiple of six.
- Stagger the increases on alternate rounds if you want a perfectly round base rather than a slightly hexagonal one.
- The handle rounds are worked last, in green.
Step by step
Part 1: The base
With orange:
Round 1: 6 sc into a MR. (6)
Round 2: Inc around. (12)
Rounds 3 to 10: On each round, work one more sc between increases than the round before: *sc in next st, inc* for Round 3, *sc in next 2 sts, inc* for Round 4, and so on up to *sc in next 8 sts, inc* for Round 10. (18, 24, 30, 36, 42, 48, 54, 60)
Check: lay it on the table. The base should be flat, with 60 stitches, and about 8″ across.
Part 2: The corner and walls
Round 11: Working in the BLO only, sc in each st around. (60)
Rounds 12 to 30: Sc in each st around. (60 per round)
Stand the bag up every few rounds. If the walls flare, your tension has loosened; if they lean in, it has tightened.
Part 3: The green rim and handles
Change to green.
Rounds 31 and 32: Sc in each st around. (60)
Round 33: Sc in next 10 sts, ch 30, sk next 10 sts, sc in next 20 sts, ch 30, sk next 10 sts, sc in last 10 sts. (40 sc and two ch-30 handles)
The two gaps start exactly 30 stitches apart, so the handles sit opposite each other.
Round 34: Sc in each sc, and 1 sc into each chain of both handles. (100)
Round 35: Sc in each st around. Sl st into the next st and fasten off. (100)
Part 4: The face
Make three triangles in black: two eyes and a nose.
Eye (make 2): Ch 7. Sc in the 2nd ch from hook and in each ch across. Turn. (6) Ch 1, sc2tog, sc in next 2 sts, sc2tog. Turn. (4) Ch 1, sc2tog twice. Turn. (2) Ch 1, sc2tog. (1) Fasten off with a long tail.
Nose: Work the eye pattern but stop after the row of 2, then sc2tog. It comes out slightly smaller.
Mouth: With black yarn, embroider a wide smile in backstitch across the front below the nose, adding two or three short vertical stitches to suggest teeth. Embroidering the mouth lets you shape it exactly how you like.
Pin the eyes and nose to the front before sewing. Place the eyes about two-thirds of the way up the wall, with the points of the triangles facing up for a friendly look or inward for a mischievous one.
Personalising the bag
Embroider the child’s name or initial on the back in black or green backstitch. It stops bags getting mixed up at parties and makes it unmistakably theirs. You can also make a ghost version in white with a black face, or a black cat version in black with green eyes and two small triangle ears sewn to the rim.
Choosing yarn colours
A true pumpkin orange is the classic, but a burnt orange looks more grown-up and a pale peach looks soft and modern. For the rim, a leafy green is traditional, and brown looks like a real stem. Black for the face shows up best, though a dark brown looks gentler for very young children.
Common mistakes and how to fix them
The bag is floppy
Your tension is too loose for a structured bag. Go down a hook size. The fabric should be firm enough that the bag stands up empty.
The handles stretch
They were worked around the chain space rather than into each chain. Work one sc into every chain for handles that keep their length.
The face looks lopsided
Pin everything before you sew and step back to look. Faces are very forgiving once they are placed evenly.
Finishing and care
Machine wash in cool water in a laundry bag and dry flat, reshaping the base while damp. A little stuffed towel inside while it dries keeps the bucket shape.
Frequently asked
How long does it take?
Three or four evenings for the bag and an hour for the face.
Can I use it for storage after Halloween?
Yes. Turn the face to the wall and it is simply a lovely orange basket for toys, yarn or books.
Making it last for years
A good trick-or-treat bag should outlive the child’s first costume. Two things make the biggest difference. First, keep your tension firm throughout, especially on the base: a firm base keeps the bag standing up even when it is heavy with sweets. Second, weave every end in carefully in two directions, particularly around the handles and the face pieces, since those take the most tugging.
After Halloween, wash it, let it dry fully with a towel stuffed inside to hold the shape, and store it flat in a pillowcase. It will come out next October looking new.
Sizes for different ages
For a toddler, stop the base at 48 stitches and work about fifteen wall rounds; the bag is light and easy for small hands. For children of four to eight, the pattern as written is ideal. For older children who take trick-or-treating seriously, add two base rounds (72 stitches) and more wall rounds, and lengthen the handles by ten chains each so the bag can go over a shoulder.
Before you start
Make the base and check it lies flat before starting the walls. More spooky makes are in Halloween.