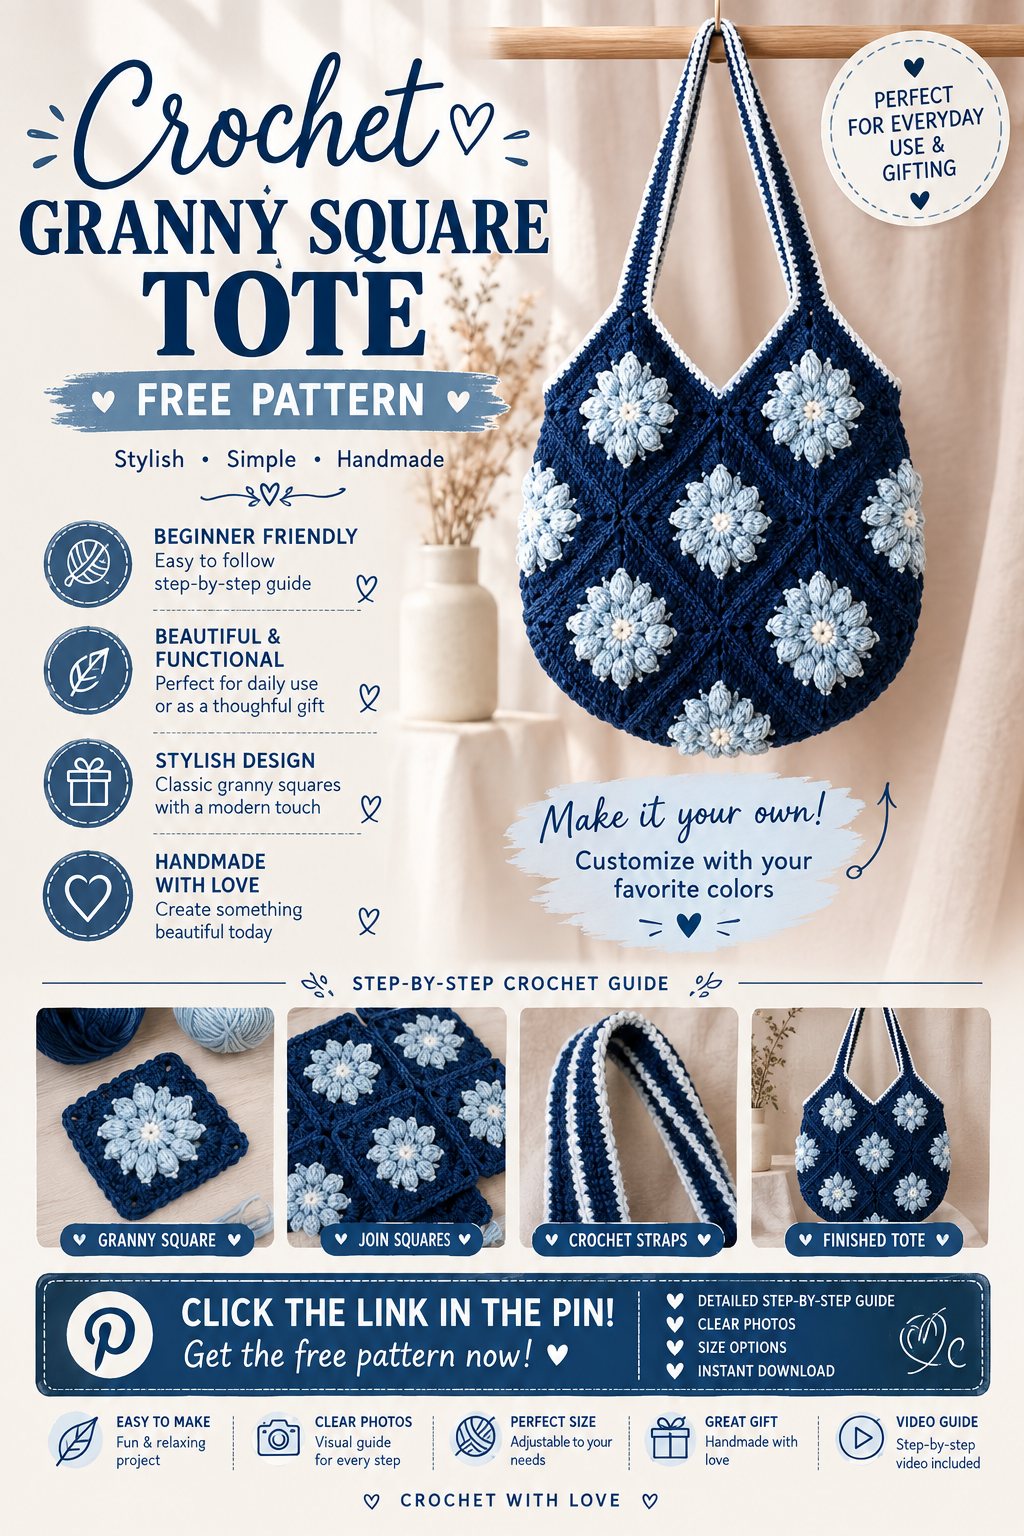
Winter Snowflake Granny Square Tote – Free Crochet Pattern
Granny squares are the thing everyone learns first and then quietly abandons, usually because the blanket they started is still in a bag somewhere. A granny square tote is the cure. Eighteen squares and you are done, and you get to carry the thing around instead of folding it away.
The winter part comes from two places: a white centre round in every square, and small six-point snowflakes sewn on afterwards. The snowflakes are worked separately, which means you can make as many or as few as you like, and you can move them around on the panel before you commit.
If you can work a double crochet and a chain, you can make this. The granny square is the most forgiving thing in crochet — the corners tell you where to go.
[IMAGE 1 — the finished tote, standing, front view]
Why this granny square tote works
A granny square grows by exactly twelve double crochet a round, every round, forever. That makes it self-checking: if your fourth round does not have 48 dc, you know before you have wasted an evening. Very little else in crochet gives you that.
Building the bag from squares rather than working it in the round also means every seam is straight, and a straight seam in dc is easy to sew invisibly. You never have to shape anything.
The honest trade-off: a granny square tote has holes in it. That is the nature of the stitch. Small things will fall through, so this wants a lining if you plan to put keys or a phone in it. I have written the lining step as optional because plenty of people use theirs for yarn and books and never bother.
Materials you will need
Main colour (navy, charcoal or forest): worsted weight, category 4. Roughly 450–550 yards. Cotton or a cotton blend holds the bag shape far better than acrylic, which stretches under weight and stays stretched.
Contrast (white or cream): about 150 yards, for the centre rounds and the snowflakes.
- Hook: 5.0 mm (H-8)
- Notions: tapestry needle, stitch markers, scissors
- Optional: half a yard of cotton fabric and a needle and thread for the lining
Avoid anything with a halo or fuzz here. The snowflakes only read as snowflakes if the stitches stay crisp.
Gauge and finished size
One finished square should measure roughly 4″ across on a 5.0 mm hook in worsted weight. Mine came out at 4¼″.
Yours does not have to match. What matters is that all eighteen squares match each other, which they will if you keep the same hook and yarn throughout. Multiply your own square size by three to know how wide your tote will be.
At 4″ squares the finished bag is about 12″ wide and 12″ tall, not counting handles.
Abbreviations
- ch = chain: yarn over, pull through the loop on your hook. One loop stays on the hook.
- dc = double crochet: yarn over, insert hook, yarn over and pull up a loop (3 loops on hook), yarn over and pull through 2 (2 loops), yarn over and pull through the last 2.
- sc = single crochet: insert hook, yarn over, pull up a loop (2 loops), yarn over and pull through both.
- sl st = slip stitch: insert hook, pull a loop through the stitch and the loop on your hook together.
- sp = space: the gap made by a chain in the round below, rather than a stitch itself.
- ch-2 corner = the two-chain gap at each corner. Every corner takes two 3-dc groups with a ch 2 between them.
Pattern notes
- Every round of the granny square is worked with the right side facing. Do not turn.
- The ch 3 at the start of each round does count as the first dc. This is the one place in the pattern where a turning chain counts.
- All dc groups are worked into the space below, not into individual stitches.
- Fasten off and rejoin for each colour change. Do not carry the white up the back — it shows through the holes.
- Count at the end of every round. A granny square gains exactly 12 dc per round, every time.
Step by step
Part 1: The granny square (make 18)
Each square uses white for Round 1 and the main colour for Rounds 2 to 4. That white centre is what makes the panel read as winter even before the snowflakes go on.
Round 1 (white): Make a magic ring. Ch 3 (counts as first dc), 2 dc into the ring, ch 2, *3 dc into the ring, ch 2*; repeat from * twice more. Join with a sl st to the top of the beginning ch 3. Fasten off. (12 dc and 4 ch-2 corners)
Round 2 (main colour): Join in any ch-2 corner. Ch 3, 2 dc in the same sp, ch 2, 3 dc in the same sp. *In the next ch-2 sp work 3 dc, ch 2, 3 dc*; repeat from * twice more. Join to the top of the ch 3. (24 dc)
Round 3: Sl st across to the next ch-2 corner. Ch 3, 2 dc in the same sp, ch 2, 3 dc in the same sp. *3 dc into the gap between the next two groups, then 3 dc, ch 2, 3 dc into the next corner sp*; repeat from * around, ending with 3 dc in the last gap. Join. (36 dc)
Round 4: Work as Round 3, with two 3-dc groups along each side instead of one. Join and fasten off, leaving a tail for seaming. (48 dc)
Check: 12, 24, 36, 48. If a round comes out short you have almost certainly missed a corner — each corner needs two groups, not one.
[IMAGE 2 — a stack of finished granny squares with white centres]
Part 2: The snowflakes (make 6)
These are worked separately in white and sewn on at the end. Making them loose means you can lay them out on the panel and shuffle them until the spacing looks right.
Round 1: Make a magic ring. Ch 1, work 12 sc into the ring. Join with a sl st to the first sc. (12 sc)
Round 2: *Ch 7. Sl st into the 2nd ch from the hook and into each of the next 5 ch, working back down the chain to the ring. Sl st into the next 2 sc.* Repeat from * five more times. (6 spokes, using all 12 sc)
Fasten off, leaving a long tail. Block each snowflake flat before sewing — pin the six points out and spray with water. Unblocked, the spokes curl and it reads as a star rather than a snowflake.
For a more detailed flake, add ch 3 and sl st into the first ch at the tip of each spoke before working back down. It makes a small picot point.
Part 3: Joining the squares
Lay out nine squares in a 3 × 3 grid for the front, and nine more for the back. Step back and look at the white centres — if one square is noticeably tighter, move it to a bottom corner where it matters least.
Join with the main colour, right sides together, using whichever seam you prefer. A sl st join gives a visible ridge on the wrong side; whip stitch through the back loops lies flatter. Both are fine.
Seam all the vertical joins first, then the horizontal ones. Doing it in that order keeps the grid square.
Part 4: Assembling the bag
Place the front and back panels right sides together. Seam up one side, across the bottom, and down the other side, leaving the top open.
Turn right side out and push the bottom corners out with your fingers.
Top edge: Join the main colour at a side seam. Work 3 sc into each ch-2 sp and 1 sc into each dc around the whole opening. Join. Work two more rounds of sc, then fasten off. This band is what stops the top edge stretching once the bag has something in it.
Part 5: The handles
Make 2. Ch 61. Sc in the 2nd ch from hook and in each ch across. Turn. (60 sc)
Work 3 more rows of sc. Fasten off, leaving a long tail.
Pin each handle to the inside of the sc band, about 3″ in from each side seam, and sew down firmly. Sew a small square or a cross rather than a single line — handles take the whole weight of the bag, and a single row of stitching pulls out.
For a longer shoulder strap, chain to twice your desired length and it will come out about right after four rows.
Part 6: Sewing on the snowflakes
Lay the bag flat and place the six snowflakes where you want them. Three on the front, three on the back, offset rather than aligned, looks better than a neat grid.
Sew each one down through the centre and at every second spoke tip. Stitch through the square beneath rather than only through the top surface, or they will flap.
[IMAGE 3 — close-up of a white snowflake sewn onto a navy granny square]
Part 7: Lining (optional)
Cut two rectangles of fabric the size of your bag plus half an inch on all sides. Sew them right sides together along the sides and bottom, fold the top edge over and press, then slip the lining inside and hand-sew it to the inside of the sc band.
If you skip this, use the bag for yarn, books and produce rather than keys.
Finishing and care
Weaving in: there are a lot of ends on this project — four per square. Weave them into the seams as you go rather than saving them all for the end.
Blocking: block the squares before joining. Granny squares come off the hook slightly wonky and block into true squares, which makes the seaming far easier.
Washing: hand wash cool and dry flat. Never hang a wet crochet bag by its handles.
Frequently asked
Why is my square not lying flat?
Almost always tension rather than stitch count. If it cups, your tension is tight — go up a hook size. If it ruffles, you have an extra group somewhere, usually a third group squeezed into a corner. Count the round: it should be 12, 24, 36, 48.
Can I make the bag bigger?
Yes. Add a fourth column and row for a 4 × 4 panel, which needs 32 squares instead of 18 and gives you roughly 16″. Or add a fifth round to each square if you want a bigger bag with the same number of seams.
What if I do not want snowflakes?
Leave them off and the tote works year round. The white centre round alone still gives it a wintery look without committing to the season.
How many ends will I actually have?
Around 76 across the eighteen squares. It is the least enjoyable part of this project and there is no way around it. Weave as you go.
Before you start
Make one square first and measure it. Everything else in the pattern scales from that one number, and it takes ten minutes.
If you make one, I would love to see it.