Sleepy Santa Crochet Pattern – Free Amigurumi Christmas Santa
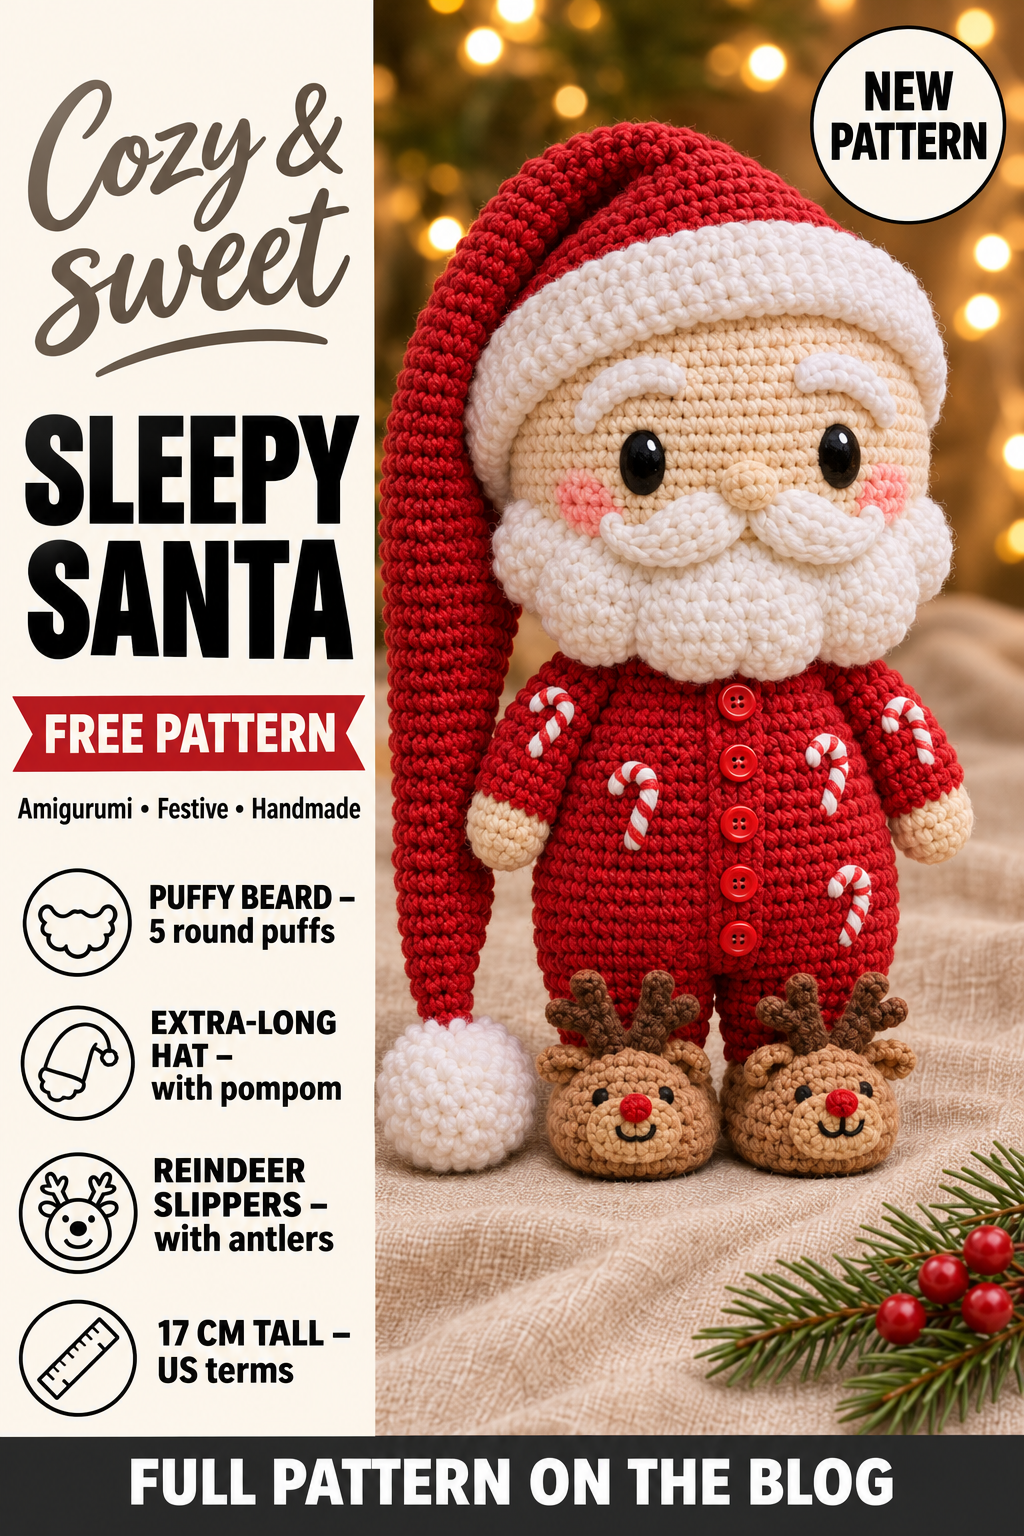
Some Christmas decorations are pretty. This one is funny. Sleepy Santa looks like he has just been woken up on Christmas Eve: big round face, curly white beard, a red onesie covered in candy canes and a stocking hat so long that the pompom drags on the floor behind him. Add a pair of tiny reindeer slippers and he becomes the decoration everyone picks up and smiles at.
This free crochet Santa pattern walks you through every piece: the head, a puffy five-part beard, eyebrows and moustache, legs that turn into slippers, a wired body, the coat placket, the extra-long hat and the way the head is attached so it sits firmly on the neck. He stands about 17 cm (6.7 in) tall in cotton yarn and a 2.2 mm hook.
If you have made a few amigurumi before, you can make Sleepy Santa. Every round is written out with its stitch count, and the tricky parts have extra notes.

PRINTABLE PDF
Want Santa on paper?
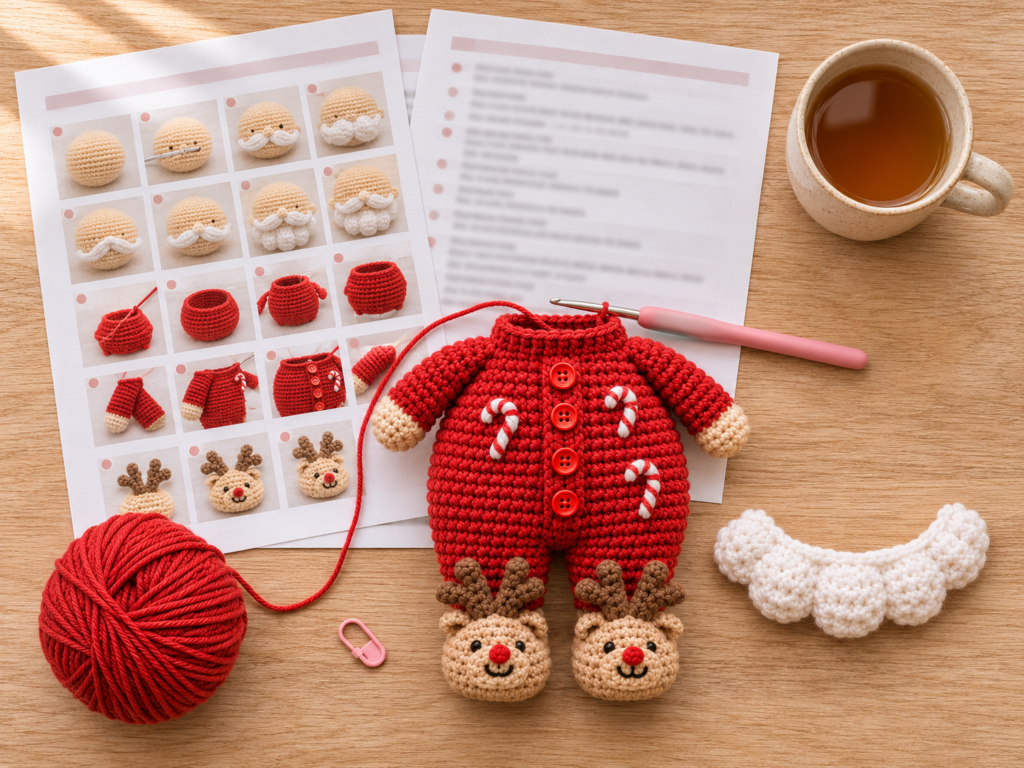
Get the ad-free 18-page PDF with the body and assembly photo guides – print it or keep it on your tablet.
Get the PDF – $2.99Why you will love this crochet Santa
- A real character, not just a shape. The sleepy face, the slippers and the long hat give him a personality that photographs beautifully for Pinterest and Instagram.
- Clever construction. The legs are crocheted first and joined straight into the body, so there is no sewing at the hips.
- He stands up. A 40 cm wire runs through the body, so Santa can sit on a shelf, a mantel or the middle of the dinner table.
- Small, satisfying details. Candy-cane embroidery, five tiny buttons and painted reindeer faces make him look shop-bought.
- A gift people keep. Make one for each grandchild, teacher or neighbour and he will come out of the decorations box every year.
Materials you will need

- Yarn: 100% cotton, 50 g / 125 m per ball, in beige (skin), white (beard, eyebrows, moustache, hat brim), red (body, arms, hat) and brown (slippers and antlers). I used Catania by Schachenmayr: beige TR263, white 106, red 115 and brown 426. One ball of each colour is plenty.
- Hook: 2.2 mm
- Eyes: 2 black oval safety eyes, 8 × 10 mm
- Wire: 40 cm long, 2.5 mm thick (for standing and shaping)
- Buttons: 5 small buttons for the coat placket
- Pompom: 1 white pompom for the tip of the hat
- Cord: about 3 m of red-and-white twisted cord or thread for the candy canes
- Paint: light brown acrylic paint for the reindeer faces
- Also: dark brown embroidery thread, fibre stuffing, glue, a sewing needle, pins, scissors and a stitch marker
Any cotton or cotton-blend yarn in a similar weight will work. Cotton is the best choice here: it shows every stitch clearly, keeps the beard puffs round and does not fuzz when Santa is handled.
Finished size and skill level
Sleepy Santa is about 17 cm (6.7 in) tall, not counting the hat tip. Your size may change a little with your yarn, hook and tension. Crochet tightly so the stuffing does not show between the stitches.
Skill level: confident beginner to intermediate. You will work in continuous rounds, change colours, crochet in the back and front loops, join pieces while crocheting and do a little embroidery.
Abbreviations (US terms)
- MR – magic ring
- ch – chain
- sl st – slip stitch
- sc – single crochet
- inc – 2 sc in the same stitch
- dec – decrease 2 stitches to 1 (invisible decrease works best)
- hdc – half double crochet
- dc – double crochet
- dc inc – 2 dc in the same stitch
- BLO – back loop only
- FLO – front loop only
- st / sts – stitch / stitches
- (…) x 6 – repeat what is in brackets 6 times
- [24] – total stitches at the end of the round
Pattern notes
- Work in continuous spiral rounds unless the pattern says otherwise. Move your stitch marker up at the start of every round.
- The hat is the exception: it is worked in joined rounds of double crochet.
- A range such as “6–14” means every round from 6 to 14, both included.
- Count your stitches at the end of every round. If the count is off, check the last increase or decrease before carrying on.
- Pin every piece in place and check Santa from the front and the side before you sew anything permanently.
Step by step
Step 1: Arms (make 2)
Start with beige for the hands. Do not stuff the arms.
- Round 1: 6 sc in MR. [6]
- Round 2: (2 sc, inc) x 2. [8]
- Round 3: 8 sc. [8]
- Change to red.
- Round 4: BLO 8 sl st. [8]
- Round 5: BLO (3 sc, inc) x 2. [10]
- Rounds 6–14: 10 sc in each round. [10]
- Fasten off.
The slip-stitch round in the back loops makes a neat little cuff line between the hand and the sleeve.
Step 2: Head
Beige yarn. The head is big on purpose: the oversized face is what makes Santa look sleepy and cute.
- Round 1: 6 sc in MR. [6]
- Round 2: 6 inc. [12]
- Round 3: (sc, inc) x 6. [18]
- Round 4: (2 sc, inc) x 6. [24]
- Round 5: (3 sc, inc) x 6. [30]
- Round 6: 2 sc, inc, (4 sc, inc) x 5, 2 sc. [36]
- Round 7: (5 sc, inc) x 6. [42]
- Round 8: 3 sc, inc, (6 sc, inc) x 5, 3 sc. [48]
- Round 9: (7 sc, inc) x 6. [54]
- Round 10: 4 sc, inc, (8 sc, inc) x 5, 4 sc. [60]
- Rounds 11–19: 60 sc in each round. [60]
- Round 20: 26 sc, ch 1, skip 1 st, 6 sc, ch 1, skip 1 st, 26 sc. [58 sc + 2 ch-1 spaces]
- Round 21: 26 sc, sc in the ch, 6 sc, sc in the ch, 26 sc. [60]
- Rounds 22–25: 60 sc in each round. [60]
- Round 26: (2 sc, dec) x 15. [45]
- Insert the safety eyes through the two openings you made in round 20 and fix the backs.
- Round 27: (3 sc, dec) x 9. [36]
- Round 28: 2 sc, dec, (4 sc, dec) x 5, 2 sc. [30]
- Round 29: (3 sc, dec) x 6. [24] Stuff the head firmly.
- Round 30: (2 sc, dec) x 6. [18]
- Round 31: BLO 18 sc. [18]
- Rounds 32–38: 18 sc in each round. [18] Fasten off.
Rounds 31–38 make a short tube inside the head. Later the neck of the body slides into it, which is what keeps the head from wobbling. Embroider a small nose with beige yarn, about 2 stitches wide, centred between and just below the eyes.
Step 3: Eyebrows (make 2)
White yarn.
- Ch 7. Starting in the 2nd ch from the hook: sl st, sc, 2 hdc, sc, sl st.
- Fasten off, leaving a long tail for sewing.
Sew the eyebrows on so their top edge sits 5 rounds above the eyes. Angle the outer ends down slightly for the sleepy look.
Step 4: Moustache (make 2)
White yarn.
- Round 1: 6 sc in MR. [6]
- Round 2: (sc, inc) x 3. [9]
- Round 3: 9 sc. [9]
- Round 4: dec, 7 sc. [8]
- Round 5: dec, 6 sc. [7]
- Round 6: dec, 5 sc. [6]
- Round 7: dec, 4 sc. [5]
- Fasten off, leaving a long tail.
Do not stuff. Each half curls naturally into a little comma shape. Sew the two halves just under the nose, with the round ends meeting in the middle and the narrow tips curling out to the sides.
Step 5: Beard (5 pieces, then join)
White yarn. The beard is made from five small cups that are joined into one big scalloped beard. This is the most fun part of the whole Santa.
- Round 1: 6 sc in MR. [6]
- Round 2: 6 inc. [12]
- Round 3: (sc, inc) x 6. [18]
- Rounds 4–5: 18 sc in each round. [18]
- Fasten off pieces 1 to 4. Do not cut the yarn on piece 5.
Lay the pieces in a row: 5, 4, 3, 2, 1. Now join them, continuing from piece 5:
- Round 1: 9 sc along piece 4, 9 sc along piece 3, 9 sc along piece 2, 18 sc all around piece 1, 9 sc along the other side of piece 2, 9 sc along piece 3, 9 sc along piece 4, 18 sc all around piece 5. [90]
- Round 2: 90 sc. [90]
- Round 3: (7 sc, dec) x 10. [80]
- Round 4: (6 sc, dec) x 10. [70]
- Round 5: (5 sc, dec) x 10. [60]
- Round 6: (4 sc, dec) x 10. [50]
- Fasten off, leaving a long tail.
Stuff the beard lightly so the puffs stay round, sew the last round closed, then sew the beard to the face under the moustache, from cheek to cheek.
Step 6: Legs and reindeer slippers
The slippers are the brown part; the red rounds are the bottom of the pyjama legs.
Right leg (brown):
- Round 1: 6 sc in MR. [6]
- Round 2: 6 inc. [12]
- Round 3: (sc, inc) x 6. [18]
- Round 4: BLO 18 sc. [18]
- Rounds 5–6: 18 sc in each round. [18]
- Round 7: 7 sc, 2 dec, 7 sc. [16]
- Round 8: 6 sc, 2 dec, 6 sc. [14] Stuff.
- Change to red.
- Round 9: FLO (sc, inc) x 7. [21]
- Round 10: 21 sc. [21]
- Fasten off and cut the yarn. Count 3 stitches back from where you finished and place a marker.
Left leg: work rounds 1–10 as for the right leg, then round 11: 15 sc. Do not cut the yarn – you carry straight on into the body. Those extra 15 stitches simply move your yarn to the right spot for joining.
Step 7: Body
Continue in red from the left leg.
- Round 1 (join the legs): ch 3, then 21 sc around the right leg, 3 sc along the chain, 6 sc along the left leg. Place your start-of-round marker here.
- Round 2: 48 sc. [48] This round goes all the way around both legs and both sides of the chain.
- Round 3: (5 sc, inc) x 8. [56]
- Round 4: 16 sc, (inc, sc) x 4, 32 sc. [60]
- Rounds 5–11: 60 sc in each round. [60]
- Round 12: (8 sc, dec) x 6. [54]
- Round 13: 54 sc. [54]
- Round 14: (7 sc, dec) x 6. [48]
- Round 15: 48 sc. [48]
- Round 16: (6 sc, dec) x 6. [42] Stuff.
- Round 17: 42 sc. [42]
- Round 18: (5 sc, dec) x 6. [36]
- Round 19: (4 sc, dec) x 6. [30]
Join the arms. Flatten the top of each arm.
- Round 20: 5 sc; 2 sc through both the arm and the body; 13 sc; 2 sc through both the second arm and the body; 8 sc. [30]
- Round 21: 5 sc, 8 sc around the first arm, 13 sc, 8 sc around the second arm, 8 sc. [42]
- Round 22: (5 sc, dec) x 6. [36]
- Round 23: 2 sc, dec, (4 sc, dec) x 5, 2 sc. [30] Insert the wire now, then add more stuffing around it.
- Round 24: (3 sc, dec) x 6. [24]
- Round 25: (2 sc, dec) x 6. [18]
- Round 26: (sc, dec) x 6. [12] Stuff.
- Rounds 27–38: 12 sc in each round. [12] This neck should measure about 5 cm. Do not stuff the neck.
- Round 39: 6 dec. Fasten off.
About the wire: fold the 40 cm wire in half to make a tall, narrow loop, then bend each half down and outwards, so the whole thing looks like a tall letter M. The loop goes up into the neck (you crochet the neck rounds around it) and the two ends go down into the legs. Cover the cut ends with a little tape and pack stuffing around the wire so it cannot poke through. The wire lets Santa stand and lets you tilt his head into that sleepy angle.
Step 8: Coat placket
Red yarn.
- Ch 25. Starting in the 3rd ch from the hook: 23 hdc.
- Fasten off, leaving a long tail.
Sew the strip down the centre front of the body, from the neck to between the legs, then sew the 5 small buttons along it.
Step 9: Slipper antlers (make 4)
Brown yarn. Leave a long starting tail.
- Ch 4; starting in the 2nd ch from the hook, 2 sl st.
- Ch 3; starting in the 2nd ch from the hook, 2 sl st.
- Ch 3; starting in the 2nd ch from the hook, 2 sl st.
- Finish with 1 sl st. Fasten off, leaving a long tail.
Sew 2 antlers to each slipper, with 3 stitches between them at the front. Use the tails to shape the little branches.
Step 10: Reindeer faces and candy canes
Paint a small reindeer face on the toe of each slipper with light brown acrylic paint and let it dry. Then embroider the eyes, eyebrows, mouth and nose with dark brown thread – a tiny red nose looks especially cute.
With the red-and-white cord, embroider little candy-cane hooks all over the onesie and sleeves. Make each one with 2 or 3 straight stitches for the stick and a short curve at the top. Scatter them at different angles; they look better slightly random than in neat rows.
Step 11: Hat
Red yarn, joined rounds. Every round ends with a sl st into the top of the starting chain, then ch 2.
- Round 1: into the MR: ch 2, 9 dc; join, ch 2. [9]
- Round 2: 9 dc; join, ch 2. [9]
- Round 3: (2 dc, dc inc) x 3; join, ch 2. [12]
- Round 4: 12 dc; join, ch 2. [12]
- Round 5: (3 dc, dc inc) x 3; join, ch 2. [15]
- Round 6: 15 dc; join, ch 2. [15]
- Round 7: (4 dc, dc inc) x 3; join, ch 2. [18]
- Round 8: 18 dc; join, ch 2. [18]
- Round 9: (5 dc, dc inc) x 3; join, ch 2. [21]
- Round 10: 21 dc; join, ch 2. [21]
- Round 11: (6 dc, dc inc) x 3; join, ch 2. [24]
- Round 12: 24 dc; join, ch 2. [24]
- Round 13: (7 dc, dc inc) x 3; join, ch 2. [27]
- Round 14: 27 dc; join, ch 2. [27]
- Round 15: (8 dc, dc inc) x 3; join, ch 2. [30]
- Round 16: 30 dc; join, ch 2. [30]
- Round 17: (9 dc, dc inc) x 3; join, ch 2. [33]
- Round 18: 33 dc; join, ch 2. [33]
- Round 19: (10 dc, dc inc) x 3; join, ch 2. [36]
- Round 20: 36 dc; join, ch 2. [36]
- Round 21: (11 dc, dc inc) x 3; join, ch 2. [39]
- Round 22: 39 dc; join, ch 2. [39]
- Round 23: (12 dc, dc inc) x 3; join, ch 2. [42]
- Round 24: 42 dc; join, ch 2. [42]
- Round 25: (13 dc, dc inc) x 3; join, ch 2. [45]
- Round 26: (14 dc, dc inc) x 3; join, ch 2. [48]
- Round 27: (15 dc, dc inc) x 3; join, ch 2. [51]
- Round 28: (16 dc, dc inc) x 3; join, ch 2. [54]
- Change to white. Turn the hat so the wrong side faces you.
- Rounds 29–36: 54 sc; sl st into the first stitch, ch 1. [54]
- Fasten off, leaving a long tail.
Fold the white brim up over the red part and sew it in place, then sew the pompom to the tip. Because you turned the work for the brim, the right side of the white shows when it is folded up. Put the hat on Santa’s head and let the long tail flop down his back and over one shoulder.
Step 12: Attach the head
- Thread a needle with beige yarn. Push it through the whole head from top to bottom, then through the neck, and back up through the head from bottom to top.
- With a second length of yarn, repeat: through the head, through the neck and back up through the head.
- Pull the neck up inside the head, so it disappears into the tube you made in rounds 31–38.
- Tie the yarn ends together firmly and hide them inside the head.
Two separate threads make the join strong. Tilt the head slightly to one side before you tie off – it makes Santa look even sleepier.

Finishing checklist
- Check the beard, moustache, eyebrows and hat from the front and the side.
- Make sure the eyes, buttons, antlers and pompom are all firmly attached.
- Squeeze and shape the stuffing so the tummy is round and smooth.
- Fluff the beard puffs and straighten the hat brim.
Common mistakes and how to fix them
- The beard looks flat. Add a little more stuffing before sewing the last round closed, and pinch each puff into shape.
- Santa falls over. The wire ends need to go right down into the slippers. Bend the slippers forward slightly so he has a wider base.
- The head wobbles. Pull the neck all the way into the head and use both yarn passes in step 12.
- Stuffing shows through. Go down a hook size or crochet more tightly; cotton with a 2.2 mm hook should make a closed fabric.
- The hat curls. Joined double-crochet rounds can twist slightly. Keep your ch 2 at the same spot every round and block the hat with a little steam.
Ways to make him your own
- Swap the candy canes for little snowflakes or stars embroidered in white.
- Use green or plaid yarn for a festive elf-style onesie.
- Skip the wire and add a hanging loop to the hat to make a big tree decoration (only for decorations out of reach of children).
- Make a matching Mrs Claus with a white bun instead of the beard.
Safety and care
Sleepy Santa contains wire, safety eyes, buttons and small parts, so he is a decoration, not a toy. Keep him away from babies and young children. To clean him, wipe gently with a soft damp cloth – do not soak or machine wash – and let him air-dry completely. Store him somewhere dry where the hat and beard will not be squashed.
PRINTABLE PDF
Want Santa on paper?
Get the ad-free 18-page PDF with the body and assembly photo guides – print it or keep it on your tablet.
Get the PDF – $2.99More Christmas patterns you will love
If you enjoyed making Santa, the rest of the Christmas collection is waiting: crochet a pair of golden Christmas Bells with a real jingle bell inside (the PDF includes a free Christmas Bunny pattern too), or download the Trio Snowman pattern free to give Santa a friend.
Frequently asked questions
How long does this Santa take to crochet?
Most makers need two or three evenings: one for the head and beard, one for the body and legs, and one for the hat, details and assembly.
Can I use a different yarn?
Yes. Any cotton or cotton blend of a similar thickness works. Thicker yarn with a bigger hook will give you a bigger Santa – just use a longer wire.
Do I have to use wire?
The wire helps Santa stand and hold his pose. Without it he will sit rather than stand, which is also very sweet.
Can I sell the Santas I make?
The pattern itself may not be copied, shared or resold. If you would like to sell finished Santas, please contact me first.
Save this pattern to your Christmas crochet board on Pinterest so you can find it again – and if you make your own Sleepy Santa, I would love to see him. Happy crocheting!