Bells and Snowflake Crochet Edging – Free Christmas Pattern
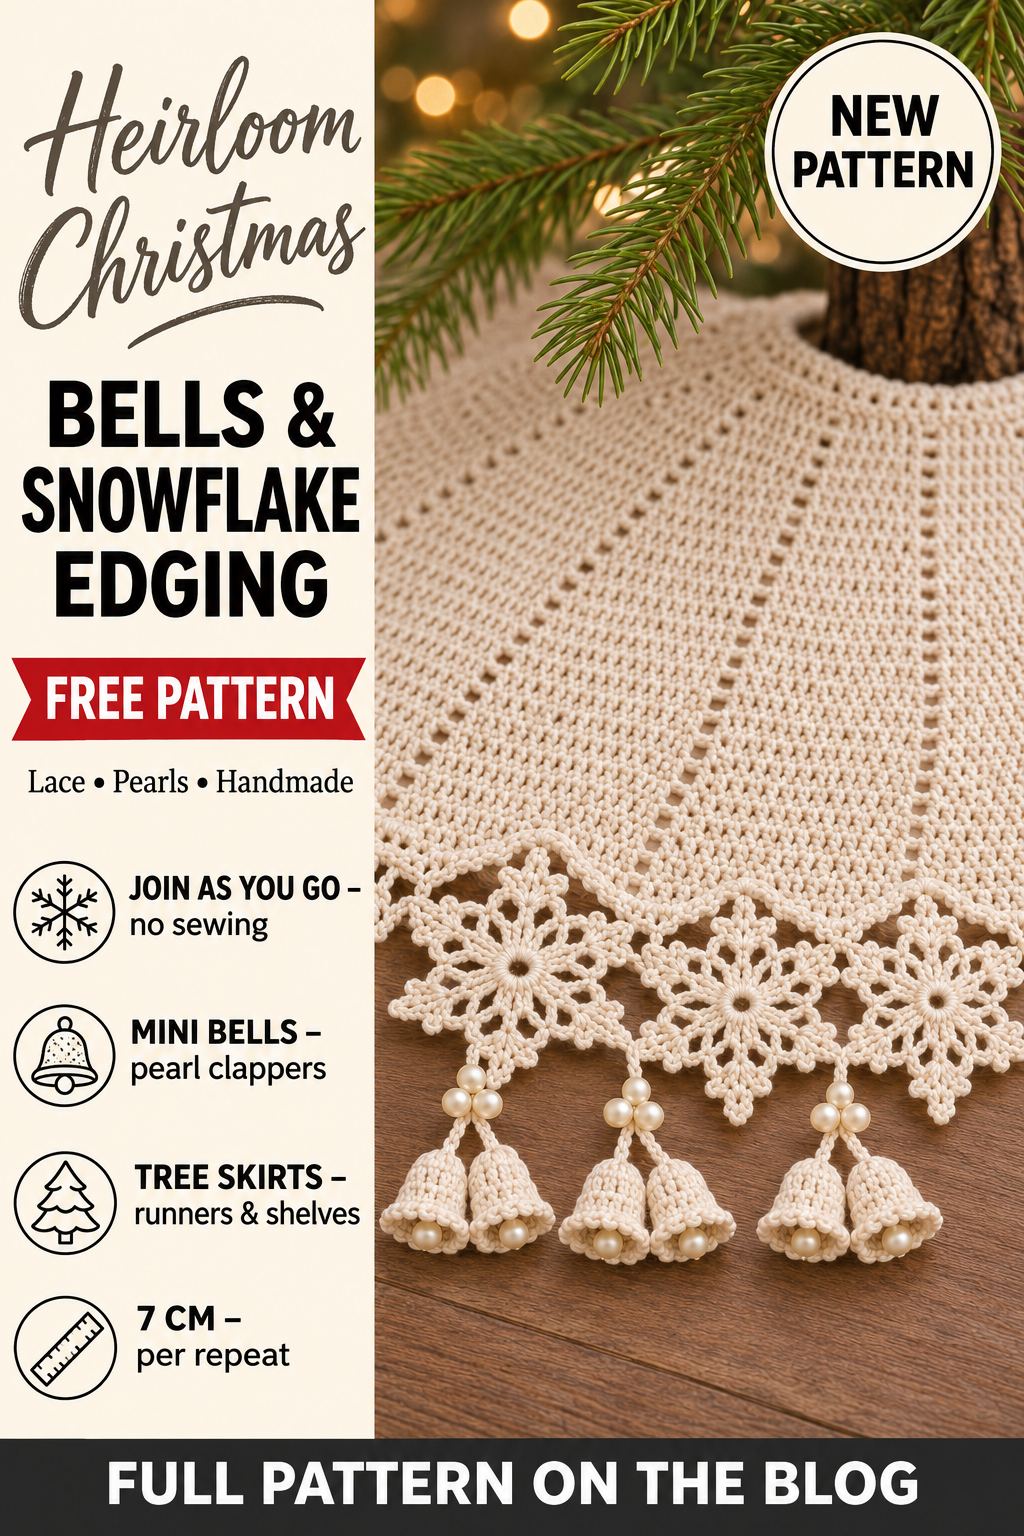
This bells and snowflake crochet edging is the kind of detail that makes people stop and look closer. Small lace snowflakes are joined into a strip as you go, and between every two snowflakes hangs a pair of tiny cream bells with a pearl inside each one.
Sew it around a tree skirt, the end of a table runner, a mantel shelf or the cuff of a Christmas stocking. In cream cotton it looks heirloom and elegant; in white it looks frosty and fresh.
Each snowflake is about 6.5 cm (2.5 in) wide and each bell is about 2.5 cm (1 in) tall. One repeat (a snowflake plus a pair of bells) covers about 7 cm of edge. Skill level: intermediate – the stitches are simple, but you will join motifs as you go.

Why you will love this Christmas edging
- Join as you go. The snowflakes are linked while you crochet them, so there is no sewing between motifs.
- Any length. Keep adding snowflakes until the strip fits your skirt, runner or shelf.
- Tiny 3D bells. Little bells with real pearl clappers give the edging movement and sparkle.
- Made for the tree skirt. It fits the edge of our crochet Christmas tree skirt perfectly.
- Uses fine cotton. A few balls of sport-weight cotton go a long way.
Materials you will need
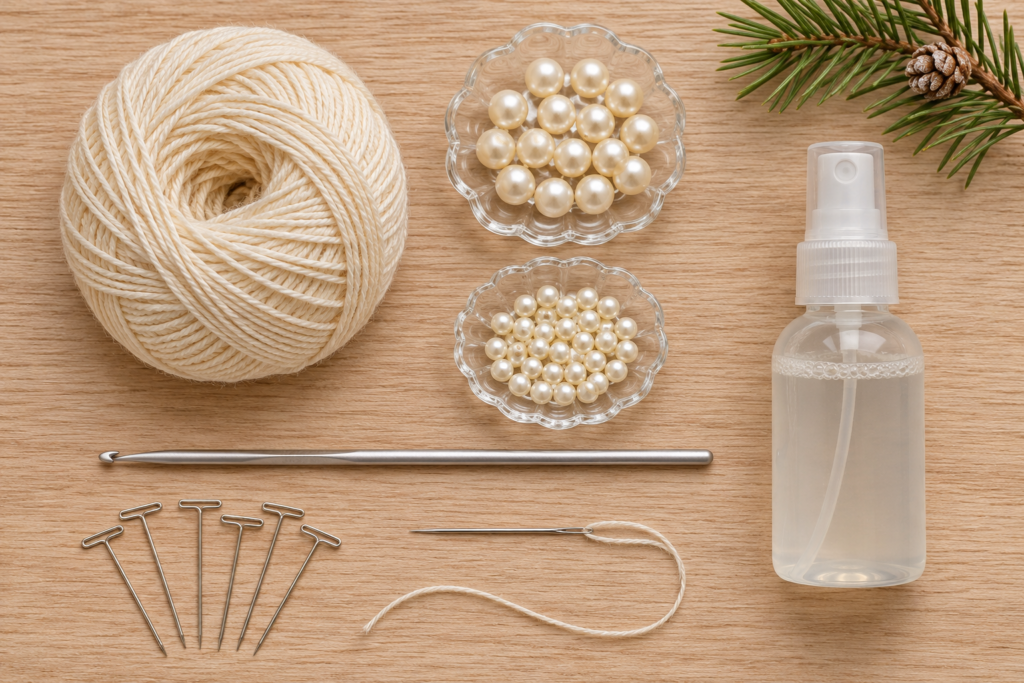
- Yarn: sport / 4-ply 100% cotton (weight 2) in cream or ivory. About 4 g per snowflake and 2 g per pair of bells.
- Hook: 2.5 mm (C-2)
- Pearls: ivory glass or acrylic pearl beads – one 6 mm pearl per bell for the clapper, plus three 4 mm pearls per pair of bells for the little cluster on top.
- Also: beading needle or fine sewing needle, cream sewing thread, tapestry needle, pins, spray starch.
How much do I need? Measure the edge, divide by 7 cm and round up. A 1 m table runner end needs about 15 repeats; the edge of our 98 cm tree skirt (about 310 cm around) needs about 44 repeats.
Finished size and skill level
Snowflakes about 6.5 cm (2.5 in) across; bells about 2.5 cm (1 in) tall; the strip is about 8 cm (3 in) deep including the bells. Skill level: intermediate.
Abbreviations (US terms)
- MR – magic ring
- ch – chain
- sl st – slip stitch
- sc – single crochet
- dc – double crochet
- inc – 2 sc in the same stitch
- sk – skip
- sp – space
- FLO – front loop only
- picot – ch 3, sl st in the 3rd ch from the hook
- (…) x 6 – repeat what is in brackets 6 times
- [24] – total stitches at the end of the round or row
Pattern notes
- Snowflakes are worked in joined rounds; bells are worked in continuous spiral rounds (use a stitch marker).
- Snowflake point: ch 4 (stem); picot (ch 3, sl st in the 3rd ch from the hook); ch 4, sl st in the 4th ch from the hook (top leaf); picot; then sl st in each of the 4 stem chains.
- Joining point: work it the same way, but for the top leaf: ch 2, sl st into the top leaf of the matching point on the previous snowflake, ch 2, sl st in the 4th ch from the hook (counting the chains you just made on this snowflake).
- The snowflakes sit side by side, joined at the points that face each other (3 o’clock on one, 9 o’clock on the next).
Step by step
Step 1: The first snowflake
- Round 1: MR, ch 3 (counts as dc), 11 dc in the ring; pull closed and sl st to the top of the ch 3. [12]
- Round 2: ch 1, sc in the same st, ch 4, sk 1, (sc in the next st, ch 4, sk 1) x 5; sl st to the first sc. [6 sc and 6 ch-4 spaces]
- Round 3: sl st into the first ch-4 space, ch 1, (sc, snowflake point, sc) in the same space and in each of the next 5 spaces; sl st to the first sc. [6 points]
- Fasten off and weave in the ends.
Step 2: Join the next snowflakes as you go
Work rounds 1 and 2 exactly as for the first snowflake. In round 3, work the first 4 points normally. On the 5th point, use the joining point to attach it to point 2 of the previous snowflake. Work the 6th point normally and finish the round.
Hold the two snowflakes with right sides facing you. Point 2 of the old snowflake and point 5 of the new snowflake should face each other across the gap. If the snowflakes overlap or twist, you joined the wrong point – undo the joining point and try the next one.
Repeat until the strip is as long as you need.
Step 3: The header (the straight top edge)
Lay the strip flat with the right side facing you. Because each new snowflake was joined on the right, the joined points (2 and 5) sit at 3 and 9 o’clock, and points 3 and 4 are the two upper points of every snowflake. Join yarn to the top leaf of point 3 on the last snowflake you made (the one on the far right).
- Row 1: ch 1, sc in the same top leaf, ch 6, sc in the top leaf of point 4 of the same snowflake; *ch 4, sc in the top leaf of point 3 of the next snowflake to the left, ch 6, sc in the top leaf of its point 4* to the end. Turn.
- Row 2: ch 1, sc in each sc and 6 sc in each ch-6 space, 4 sc in each ch-4 space. Fasten off.
This straight row of single crochet is what you sew or crochet onto the tree skirt, runner or shelf.
Step 4: Mini bells (make 2 for each join between snowflakes)
- Round 1: 6 sc in a MR. [6]
- Round 2: (sc, inc) x 3. [9]
- Round 3: sc in each st around. [9]
- Round 4: (2 sc, inc) x 3. [12]
- Round 5: sc in each st around. [12]
- Round 6: (3 sc, inc) x 3. [15]
- Round 7: sc in each st around. [15]
- Round 8 (the flare): FLO (2 sc, inc) x 5. [20]
- Round 9: sl st in each st around. Fasten off, leaving a 20 cm tail.
Working round 8 in the front loops makes the rim flick outwards like a real bell. Do not stuff the bells. A quick spray of starch helps them keep their shape.
Step 5: Pearls and bell pairs
- Clapper: thread a needle with cream sewing thread, knot it, slide on a 6 mm pearl and push the needle up through the centre of the bell top. Adjust so the pearl hangs just inside the rim, then knot firmly on top.
- Pair: hold two bells side by side and use the yarn tails to sew their tops together.
- Pearl cluster: sew three 4 mm pearls in a little triangle over the join at the top of the pair.
- Hanging chain: using one yarn tail, ch 6 from the top of the pair.
Attaching the bells and the edging
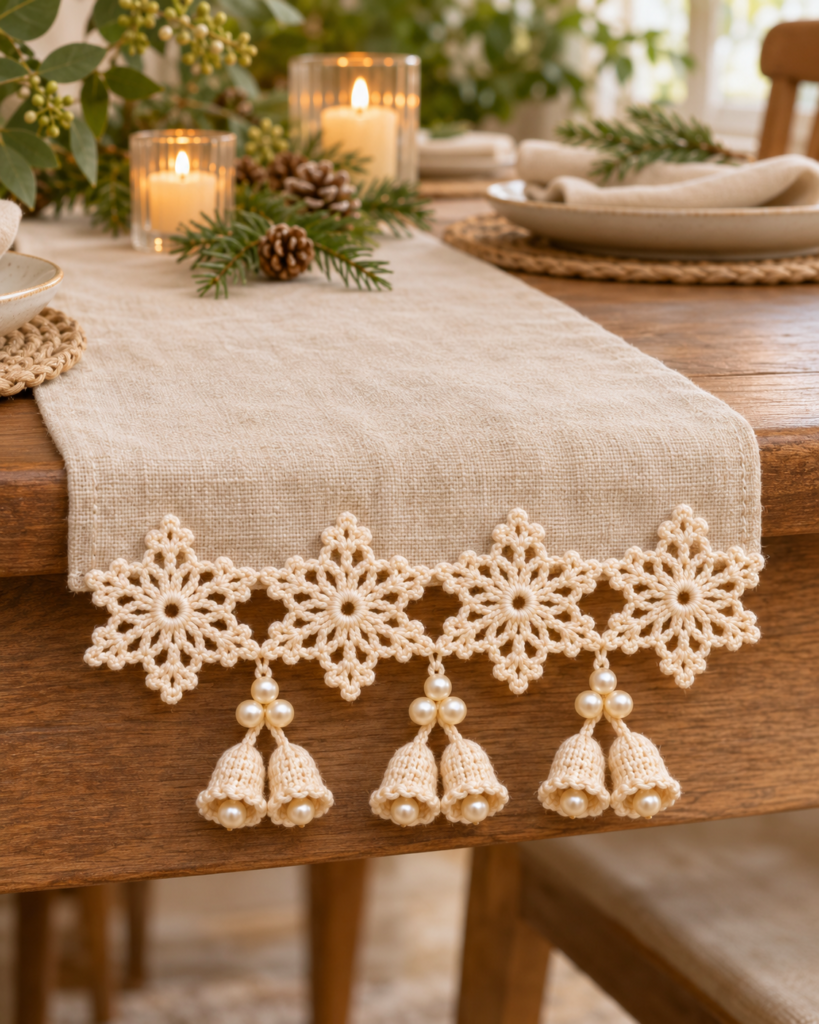
- Sew each pair of bells under a join between two snowflakes: attach the end of the ch 6 to the joined point leaves so the bells hang just below the snowflakes.
- Pin the edging along your project with the header against the edge, right sides facing up.
- Sew the header on with cream yarn and a whip stitch, or crochet it on by working sc through both the header and the project edge.
- Starch and pin the snowflake points flat once the edging is in place.
Finishing checklist
- Every snowflake joined at the side points, none twisted.
- Header row straight and flat, not pulling the edge in.
- Pearls sewn on firmly with doubled thread.
- All bells hanging at the same height.
Common mistakes and how to fix them
- The header ruffles. Use ch 5 instead of ch 6 in row 1 for a tighter top edge.
- The header pulls the edging tight. Use ch 7 instead of ch 6, and add 1 sc to each ch space in row 2.
- Bells cone instead of bell shape. Make sure round 8 is worked in the front loops only.
- Pearls come loose. Use doubled thread and knot twice on top of the bell before hiding the end inside.
Ways to make it your own
- Use gold pearls and gold metallic thread for a festive look.
- Leave out the bells for a simple snowflake lace edging.
- Make the strip short and sew it to the cuff of a Christmas stocking.
- Make one long strip and hang it as a shelf garland.
Safety and care
Pearls and small beads are choking hazards, so keep the edging out of reach of babies, young children and pets. Hand wash gently in cool water if needed, then reshape, starch and dry flat.
More Christmas patterns you will love
Put this edging on our crochet Christmas tree skirt, make bigger crochet pearl bell ornaments for the tree, or try the golden Christmas Bells pattern with real jingle bells inside.
Frequently asked questions
Can I use thicker yarn?
Yes. With DK cotton and a 3 mm hook everything grows by about a third; each repeat then covers about 9 cm of edge.
Do I have to use pearls?
No – the bells look sweet without clappers, or with tiny jingle bells instead (for decorations only).
How do I add it to a round tree skirt?
Make the strip slightly longer than the edge, pin it on in quarters first, then ease the extra in evenly before sewing.
Can I wash it?
Hand wash in cool water, then re-starch. Avoid the washing machine because of the pearls.
Save this bells and snowflake edging to your Christmas crochet board on Pinterest, and happy crocheting!